 Loop
Loop
An advanced guide to
Claude Code
What I've learnt from using Claude Code,
and strategies you can use to get even better results.
Claude Code is an incredibly powerful tool from Anthropic, which brings their advanced AI model into your terminal window. It can edit files, run commands, search your codebase, and build features from start to finish - all from a single conversation.
I've been using it every day for about a year now, and it's easily the biggest improvement to my workflow in years. That said, the quality of what you get back depends almost entirely on one thing: how specific you are with your prompts.
I made a lot of mistakes early on - vague prompts, wasted context, and letting Claude go down the wrong path before stepping in. This guide covers the strategies I regularly use in my professional work, so that you can skip the same trial-and-error phase. It assumes that you've already installed Claude Code and built a few small things - but if you haven't, you might want to start with my beginner guide first.
1. Write clear, specific prompts
This is the single biggest tip I can give you and the one thing that will immediately improve your results. Previously, I would write lazy prompts like "add a dark mode toggle" and then get frustrated when Claude made a bunch of decisions that I didn't agree with. It would pick the wrong file, use the wrong component library, or change things that I didn't want to be changed.
Instead, you should spend the extra 30 seconds and be incredibly specific about what you want to happen. Tell Claude which files it should change, what components to reuse, and what not to touch. You'll immediately see the results improve and it'll mean there's less back-and-forth, which will save you time too.
When you're writing a prompt, try to include:
- File paths - use
@filenameto reference files directly, so that Claude reads them before responding. Or you can copy the specific path, like/components/footer.tsx - Desired outcome - describe what the end result should look like
- Existing components - point to similar code that already exists in your project
- Constraints - mention anything that you don't want to be changed
You can also pipe data directly into Claude Code. Running cat error.log | claude will send the file straight into your conversation, which is really useful when you're sharing error logs or the build output.
Here's an example of a vague prompt versus a specific one:
Add a dark mode toggle to my app.
Add a dark mode toggle to the site header, which is found in components/site-header.tsx. - Use the existing Button component from components/ui/button.tsx - Store the preference in localStorage with the key "theme" - Toggle a "dark" class on the <html> element (Tailwind's dark mode strategy) - Use a sun/moon icon from lucide-react, make sure that it matches the existing icon style in the header - We should default to using the user's system preference on their first visit - Don't modify the existing colour scheme, just add the toggle button next to the existing nav items
The second prompt tells Claude exactly where to make changes, which components to reuse, how to store the state, and what not to break. It takes a few extra seconds to write, but it saves you from having to go back-and-forth correcting things.
By being specific from the very start, you'll get the results you want in the first 1-2 prompts and save yourself a lot of time.
2. Include images to guide the output
Claude Code can also read images, which is an incredibly powerful way to improve your results - but most people aren't aware of this feature. If you're working on anything visual - such as a new UI component, screen layout, or any other design - pasting a screenshot into the conversation is far more effective than trying to describe what you want in words.
AI models have become incredibly good at analysing images and identifying key objects within them, so you should use this to your advantage. I've found that images are especially useful in two situations:
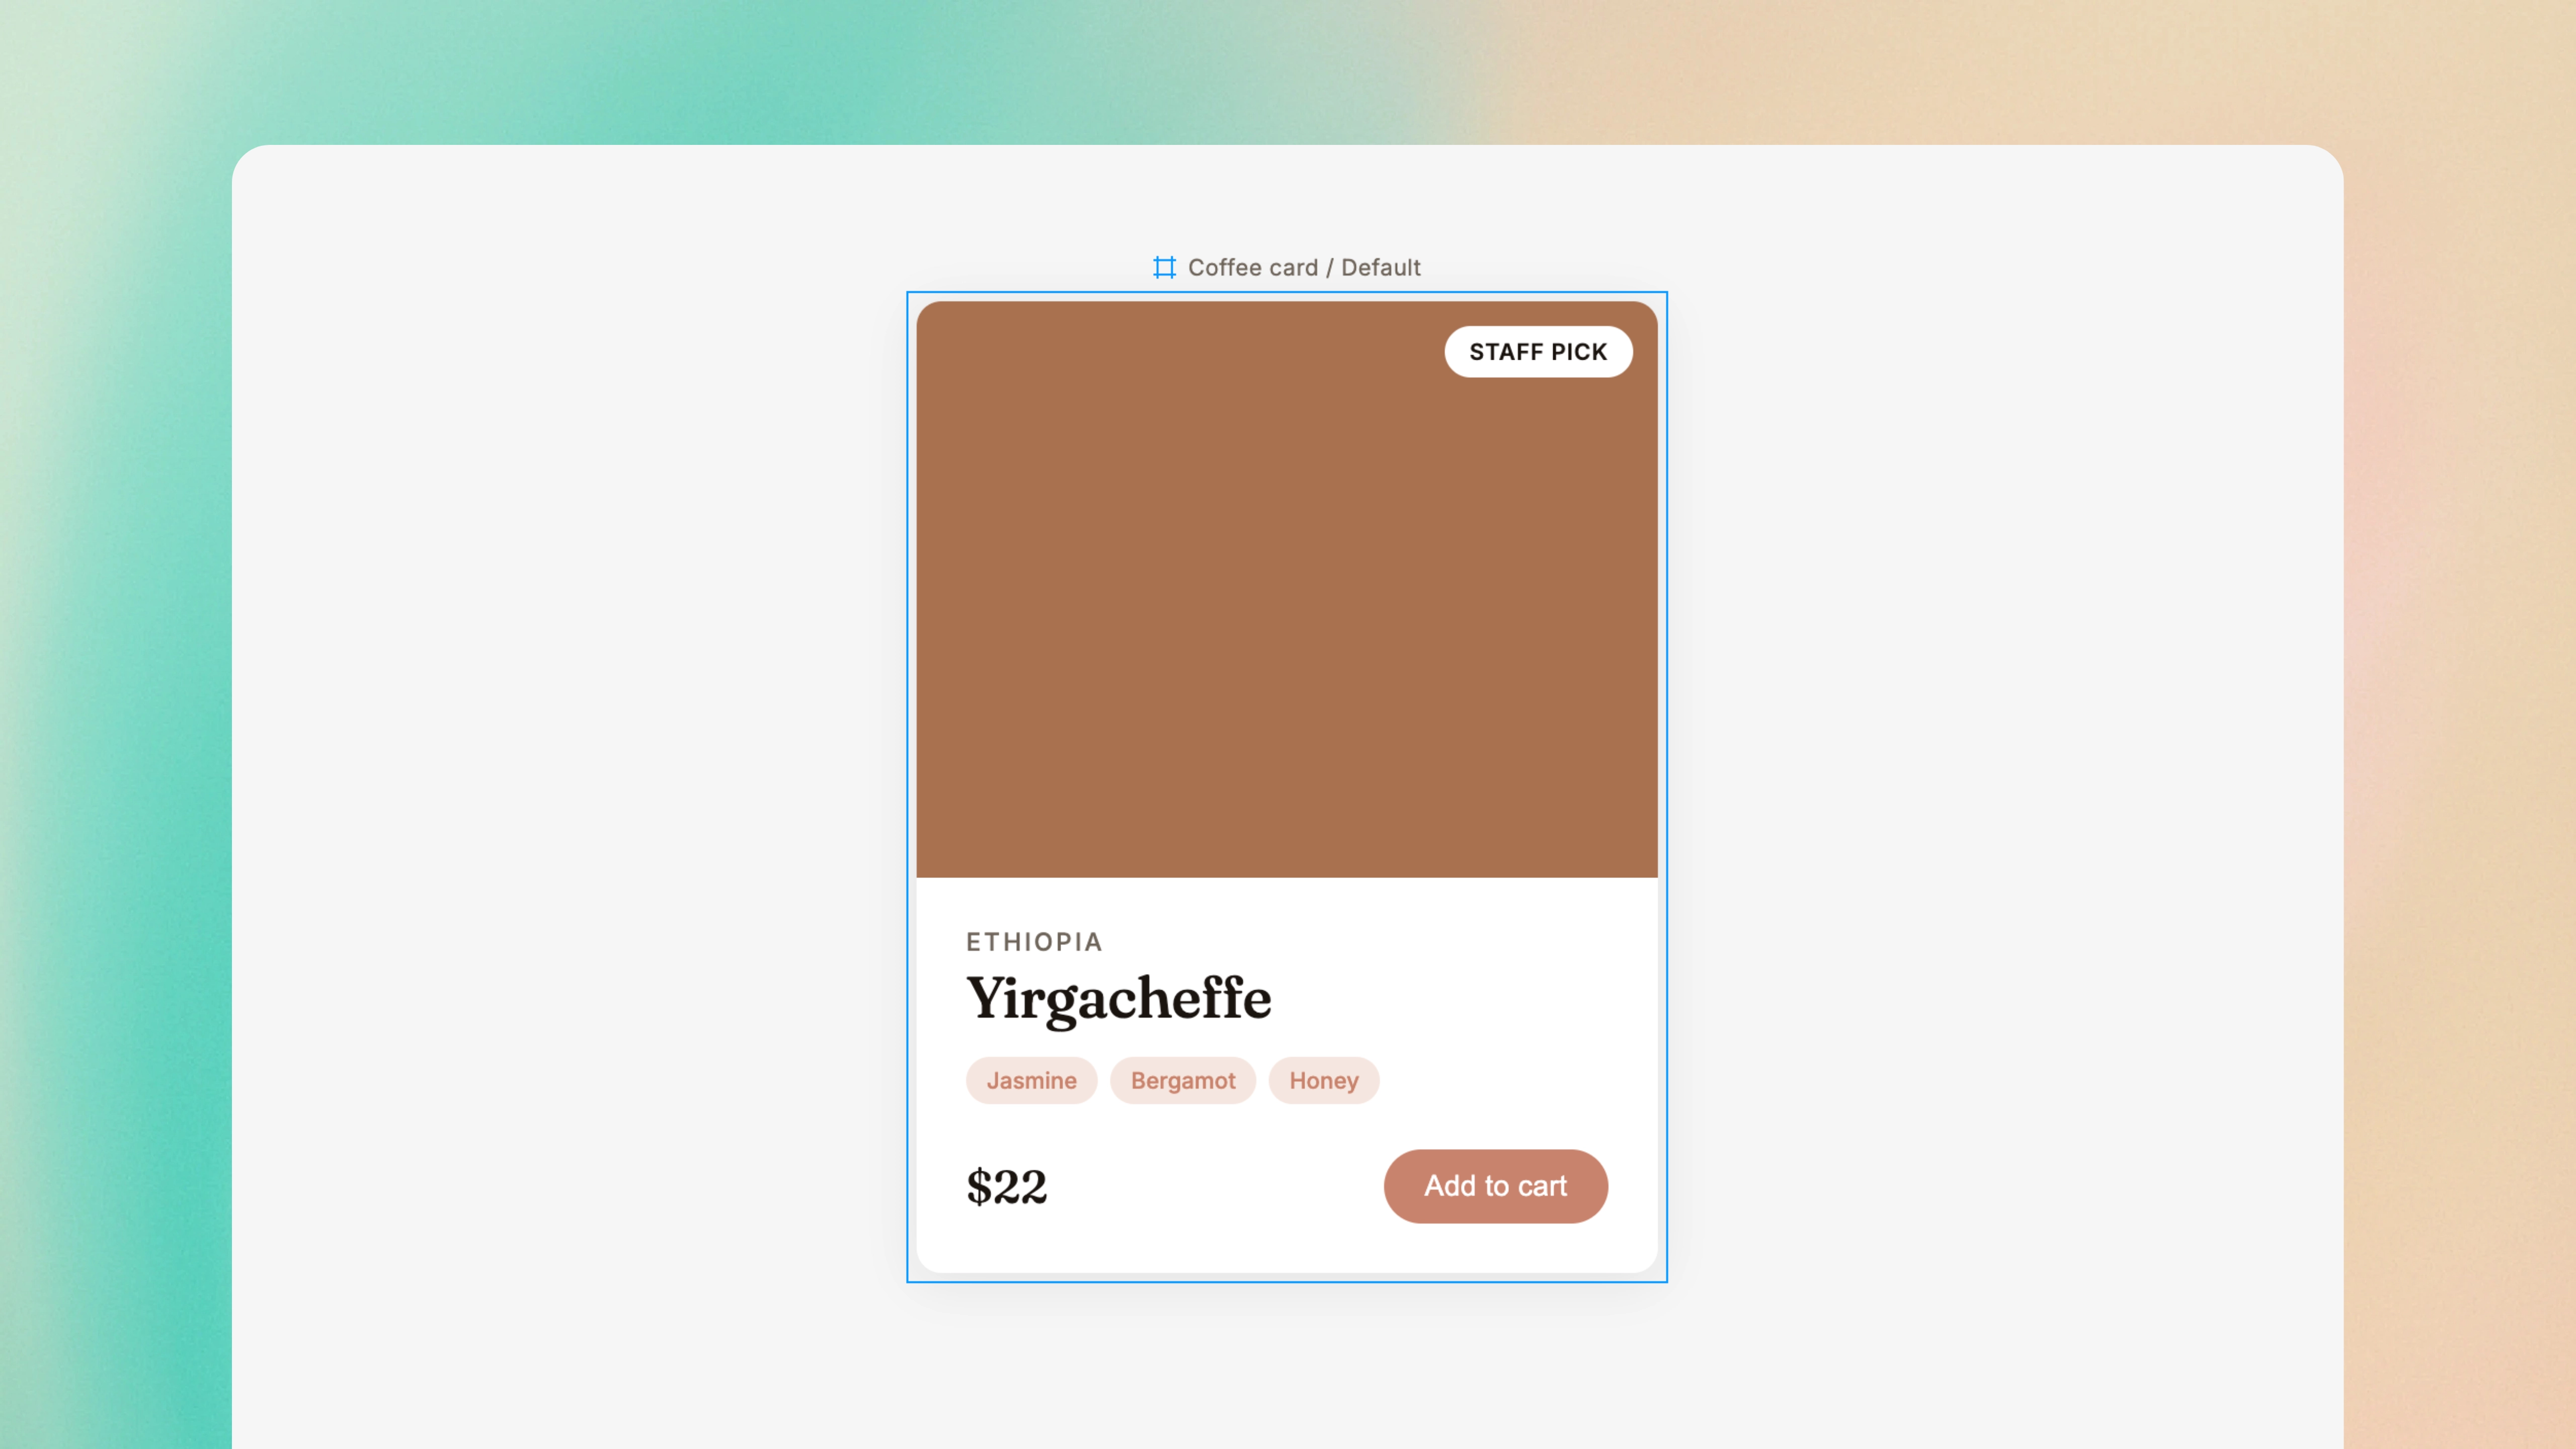
Showing what good looks like. If you have a design in Figma, a mockup from a designer, or even a screenshot of another site that has the style you're going for - paste it in. Claude can use it as a reference and build towards it, rather than guessing what you had in mind.
I've attached a screenshot that shows the coffee card design from Figma. Implement this as a React component in components/coffee-card.tsx. - Match the border radius, padding, and shadow from the design - The coffee name is in Yirgacheffe with the origin in small caps above it - Tasting notes render as pill-shaped chips using the terracotta accent - Use the colours from our Tailwind config - Make it responsive - stack the cover image above the details on mobile, side-by-side on desktop
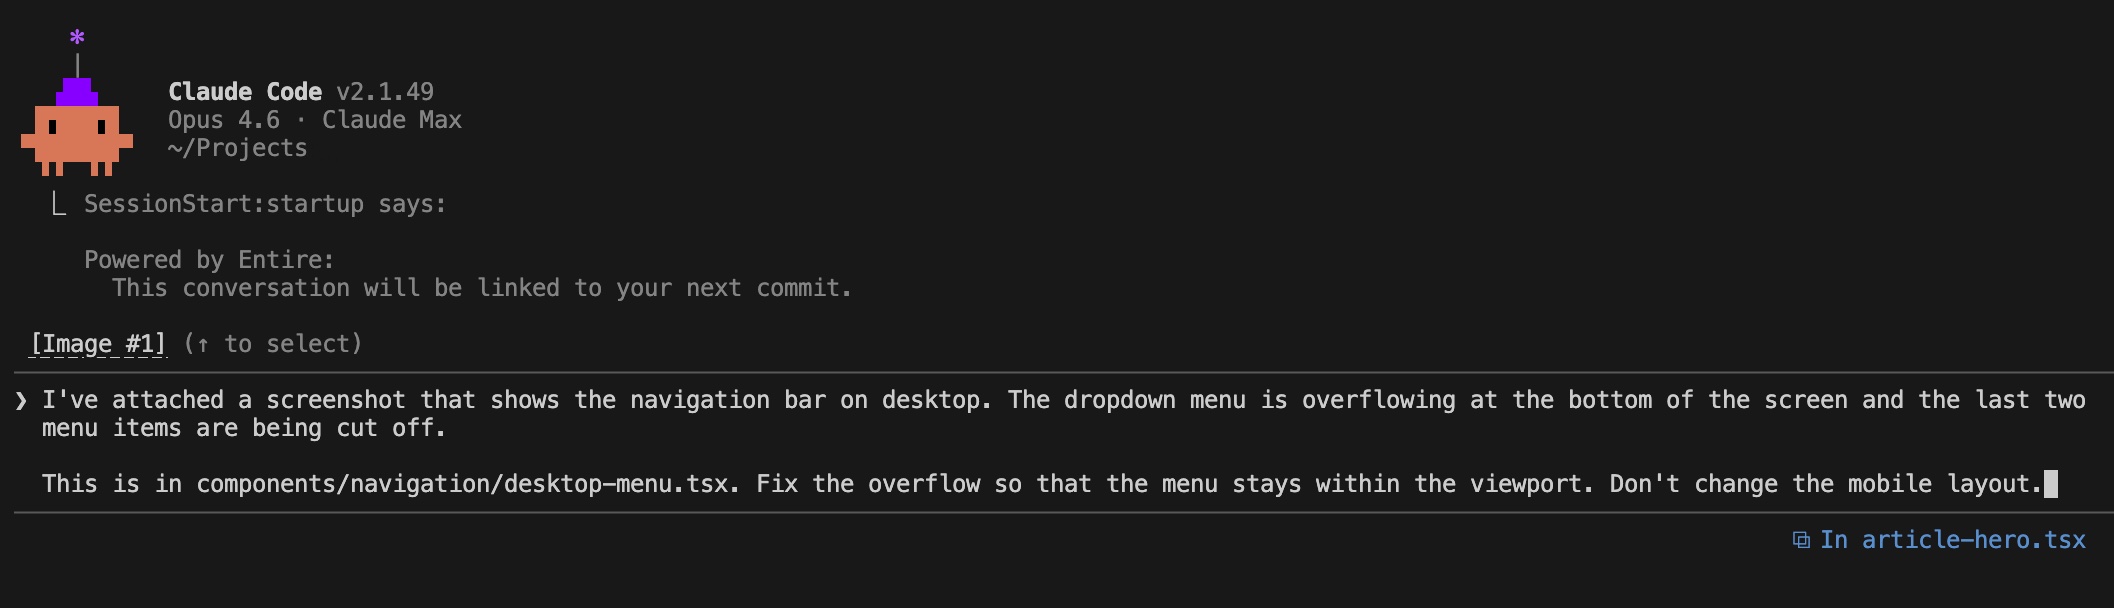
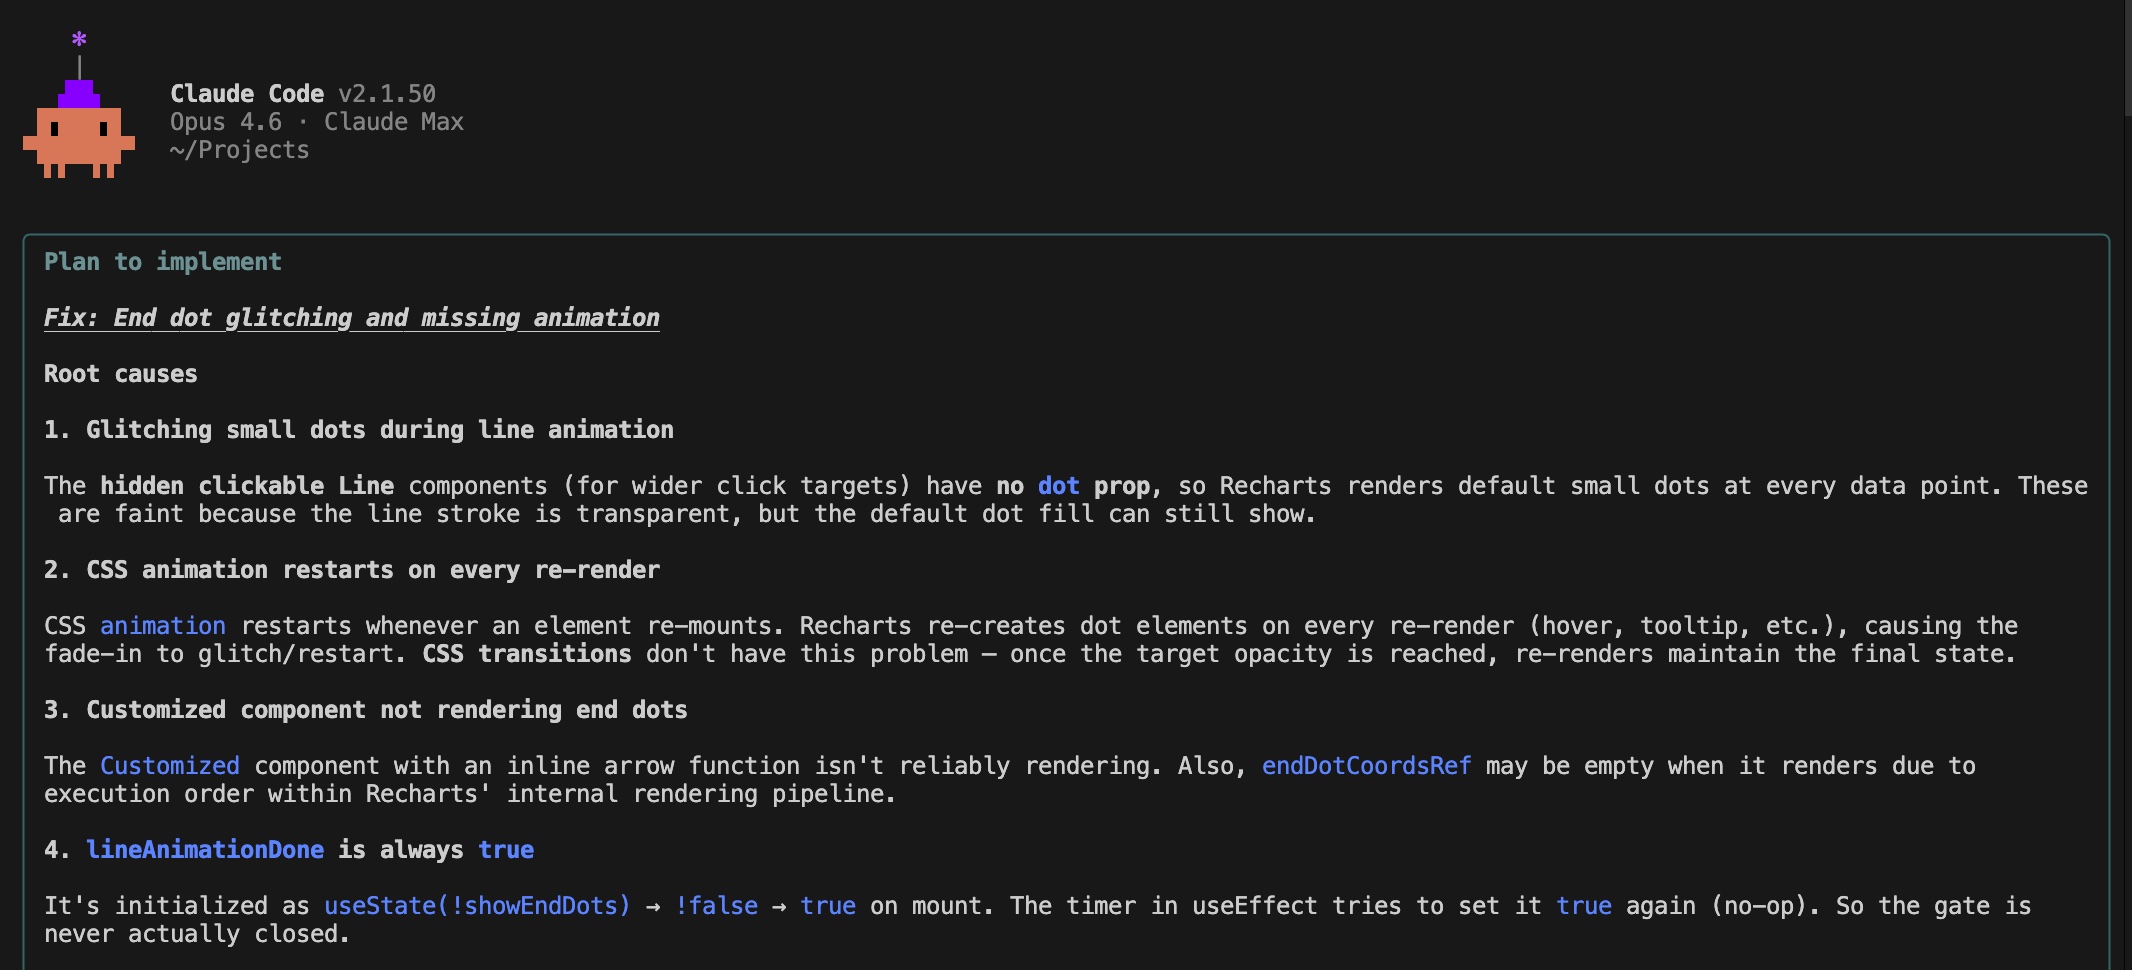
Showing what's broken. I've wasted a lot of time trying to describe visual bugs with text. "The dropdown is overflowing" doesn't give Claude much to work with. But if you attach a screenshot of the broken layout, Claude can see exactly what you're seeing and quickly fix the bug.
I've attached a screenshot that shows Drip's navigation bar on desktop. The Shop dropdown is overflowing at the bottom of the screen and the last two categories are being cut off. This is in components/site-header.tsx. Fix the overflow so that the dropdown stays within the viewport. Don't change the layout on mobile.

You can paste images directly into the Claude Code terminal or reference image files in your project. Either way, it will cut down on the back-and-forth messages and save you lots of time.
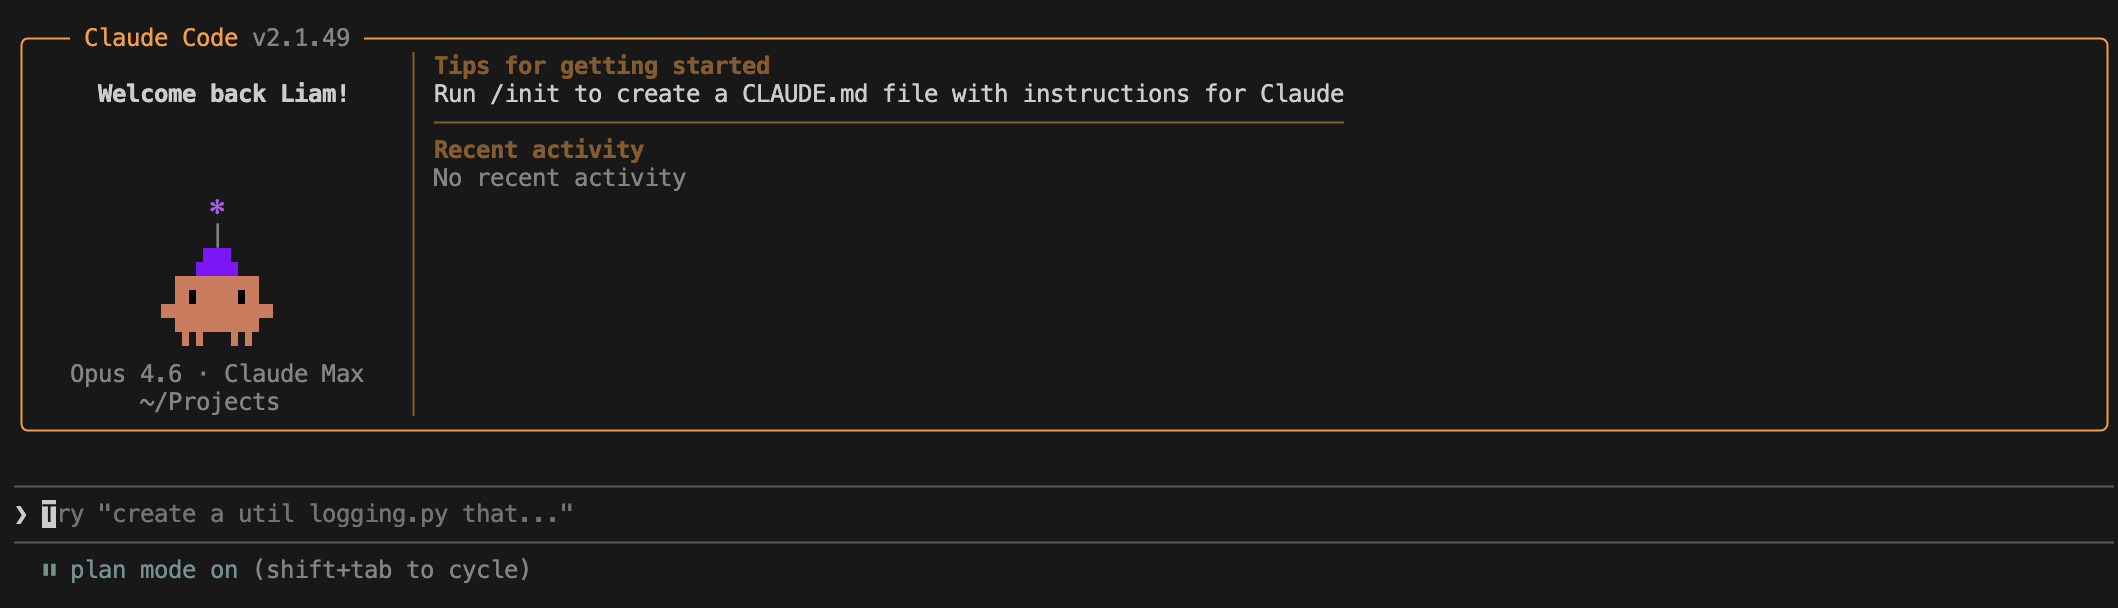
And here's the same view after Claude applied the fix:


Loop Newsletter
Get weekly AI insights delivered to your inbox
Subscribe for freeRead by executives at:

3. Ask Claude to research the codebase first
Before you jump into writing code, it's worth asking Claude to explore your codebase and summarise what it finds. This is especially useful when you're picking up someone else's code, onboarding to a new project, or trying to understand how something works before you change it.
Claude is really good at reading files, searching for patterns, tracing imports, and building a picture of how things fit together. By doing this research upfront, you both have a shared understanding of the code before any changes are made - which leads to better decisions and fewer surprises.
This will give Claude an overview of your codebase and focus the results in future messages. It also means that Claude is less likely to duplicate components that already exist in your codebase, as it's able to spot and re-use them.
Before we make any changes, I need you to research how authentication works in this codebase. Focus on: - Where are the auth-related files? (middleware, hooks, context providers, API routes) - How are protected routes currently handled? - What session/token strategy is being used? - Are there any utility functions for checking auth state? Summarise what you've found, so that we can discuss the approach before we implement anything.
I've used this approach when investigating complex bugs that span multiple files and when I'm planning to do a refactor. Rather than having to read through dozens of files yourself, you can let Claude do the legwork and show a clear summary.
You can also use this to generate documentation. Just ask Claude to explore a module and write up how it works - it's a great way to create internal docs for parts of your codebase that have never been properly documented.
4. Use plan mode for complex tasks
When you're trying to do a significant piece of work - whether it's a new feature, refactoring multiple files, or a bug that you haven't properly diagnosed - you should always use plan mode first. You can activate it by typing /plan or by pressing Shift+Tab to toggle it on.
In plan mode, Claude will explore your codebase, read any relevant files, and draft a plan before it writes any code. I've found this to be really valuable, as it gives Claude time to "think" and explore the problem in-depth. Plus, you a chance to see the plan and change course, before Claude goes and makes a bunch of changes that you didn't want.
I tend to use plan mode when:
Building something new from scratch
Adding a new feature, page, or workflow where the shape isn't obvious yet - planning helps Claude think through the structure before any code gets written.
Refactoring code that already works
Restructuring or cleaning up code without changing behaviour - planning helps Claude avoid breaking the parts you didn't mean to touch.
Changes span several files
The change will affect several files or components - planning helps Claude work out the order of changes and avoid leaving things in an inconsistent state.
Multiple ways to solve it
There's no single right way to solve it - planning surfaces the trade-offs of each approach, so you can pick the direction before Claude writes any code.
Unfamiliar codebase
You're working in a part of the codebase you don't know well - planning gives Claude time to read through the existing code first, so its proposed changes actually fit how things already work.
Needs the full picture
You want Claude to understand how the change fits into the wider system - planning lets it trace dependencies and spot things that might also need to change downstream.
The stakes are high
Anything touching auth, payments, or production-critical paths - planning helps surface risks and catch edge cases before they reach production.
Claude is stuck on a bug
Claude is struggling with a fix and needs more time to "think" through the options - planning forces it to reason about the root cause before throwing another patch at it.
I want you to add authentication to my app. We need: - A login page at /login - A signup page at /signup - Protected routes that redirect to /login if not authenticated - Manage the sessions with cookies Before you implement any code, I want you to review the route code in app/ and how we currently have the middleware setup. You need to properly understand your approach before you start writing the code.
After you've reviewed Claude's plan, you can approve it, ask for changes, or reject it entirely. This back-and-forth is far cheaper than having to undo a bunch of changes that went in the wrong direction.
That said, you don't use plan mode for everything. If the fix is small and you know exactly what needs to change, just ask Claude to do it directly. Planning will add some overhead and it's not necessary for those simple fixes.
But plan mode is only half the story when it comes to how you control Claude's reasoning. It decides when the thinking happens, but it doesn't decide how hard Claude reasons while it's writing the code.
A good way to think about this is breadth vs depth:
- Plan mode - use when you need to go broad into a problem
e.g. when a problem touches multiple files, you want Claude to explore the codebase, or you need a wide view before committing to a direction - Thinking mode - use when you need to go deep into a problem
e.g. when you're focused on a specific problem or a tricky bug, and Claude needs more time to reason through it
By default, Claude will adjust this reasoning setting for you and will automatically "think" harder when it's facing a more complex task. If you want to change this yourself, you can run /effort and pick a level - the options are low, medium, high, xhigh, and max.
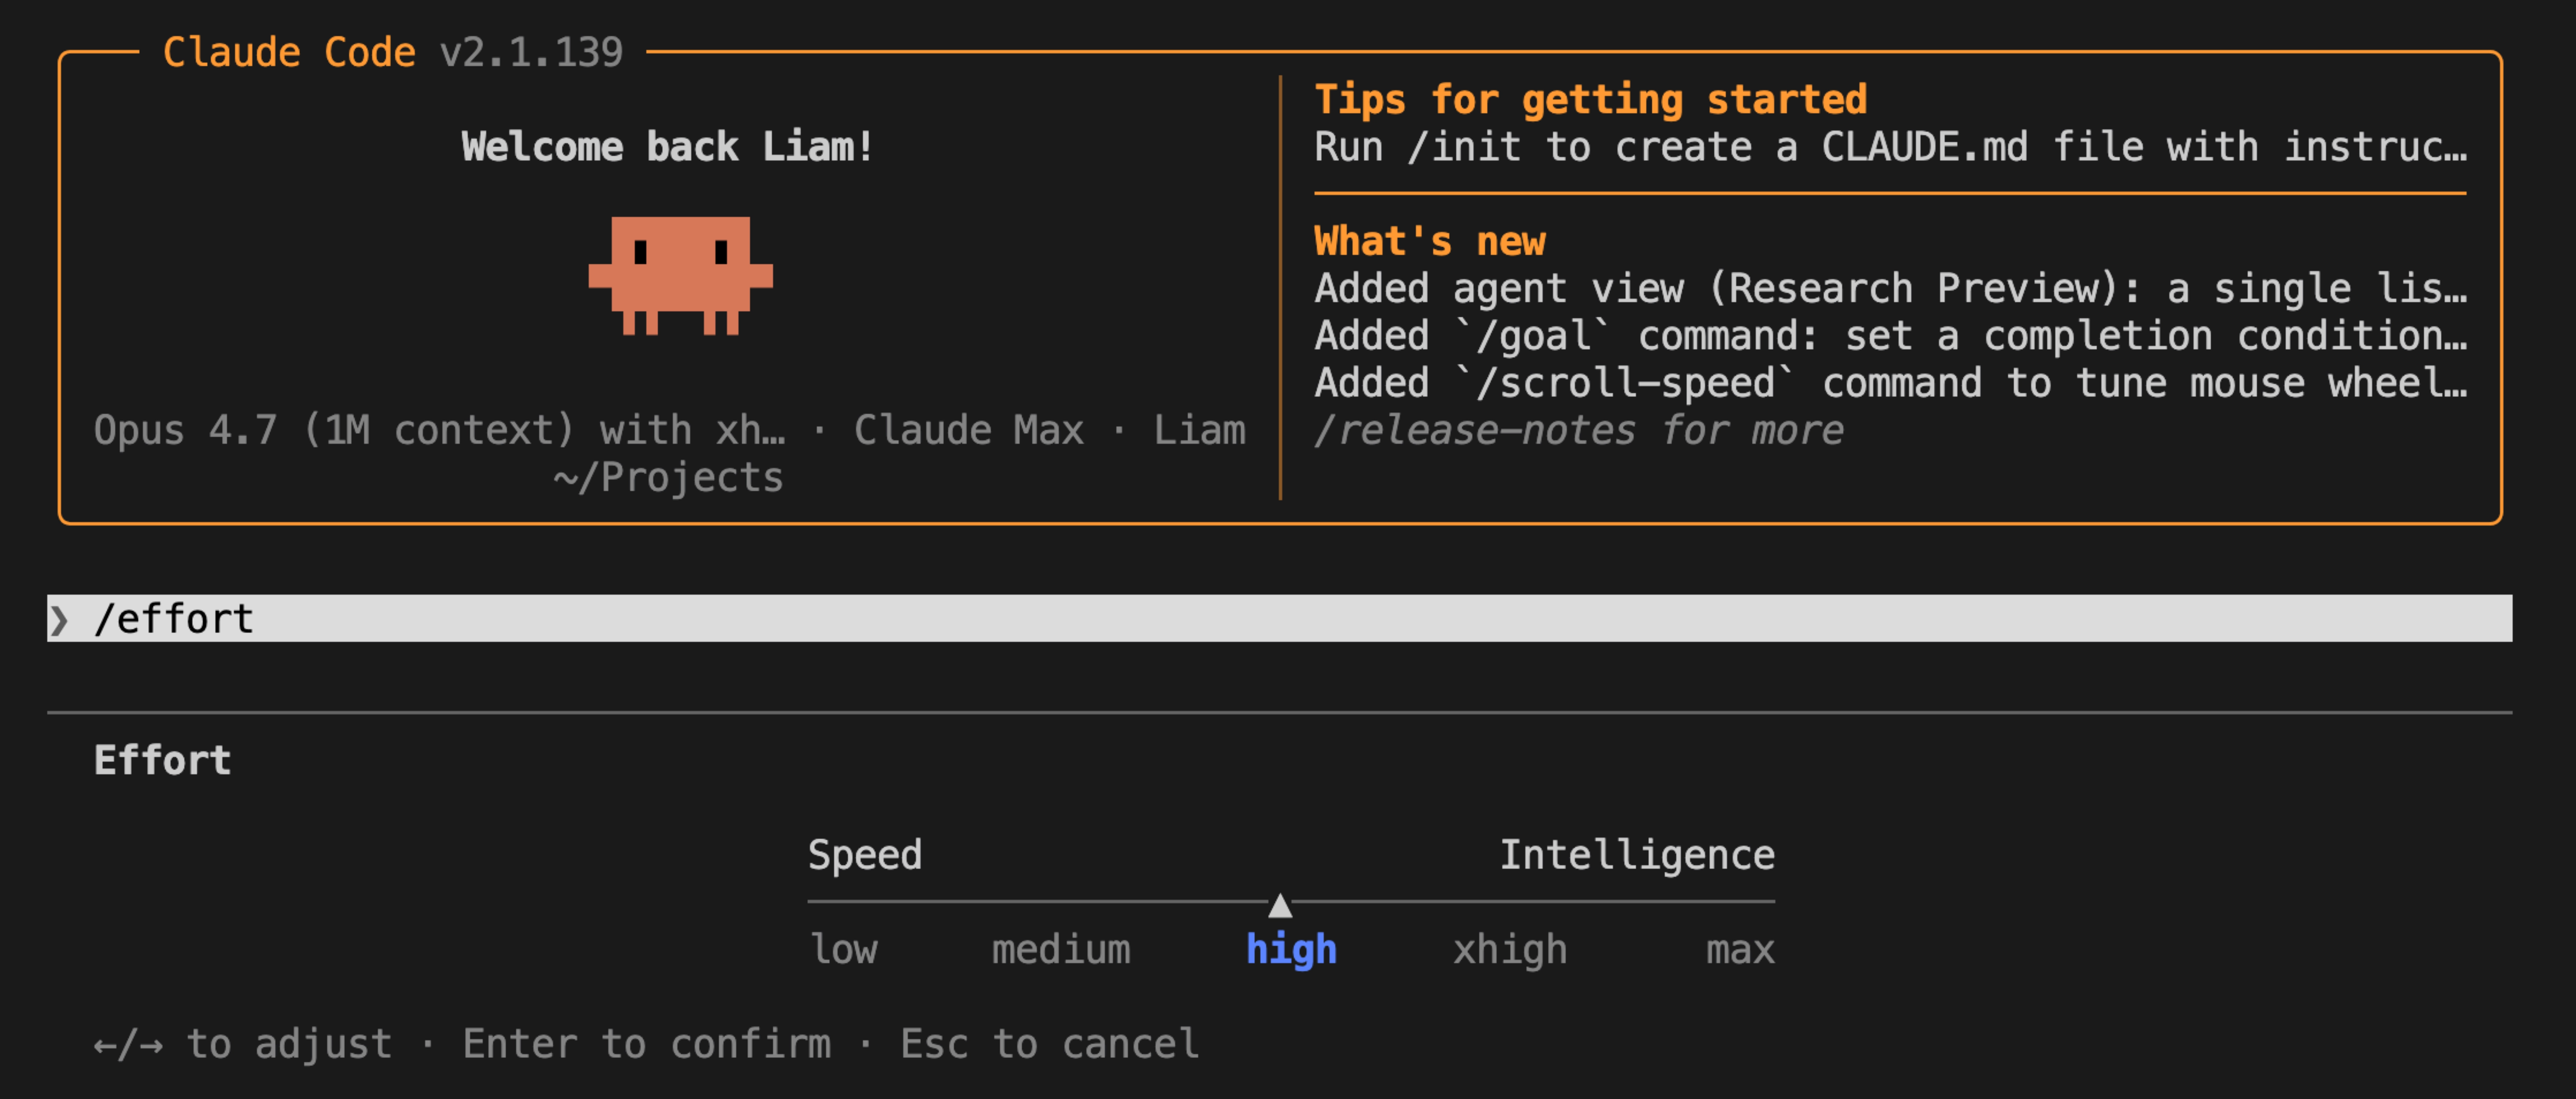
The higher levels will give Claude a bigger reasoning budget, but it will use more tokens and the response times will be longer. I typically leave mine on the default setting - then bump it up when I'm stuck on a genuinely hard problem and the default isn't getting me through.
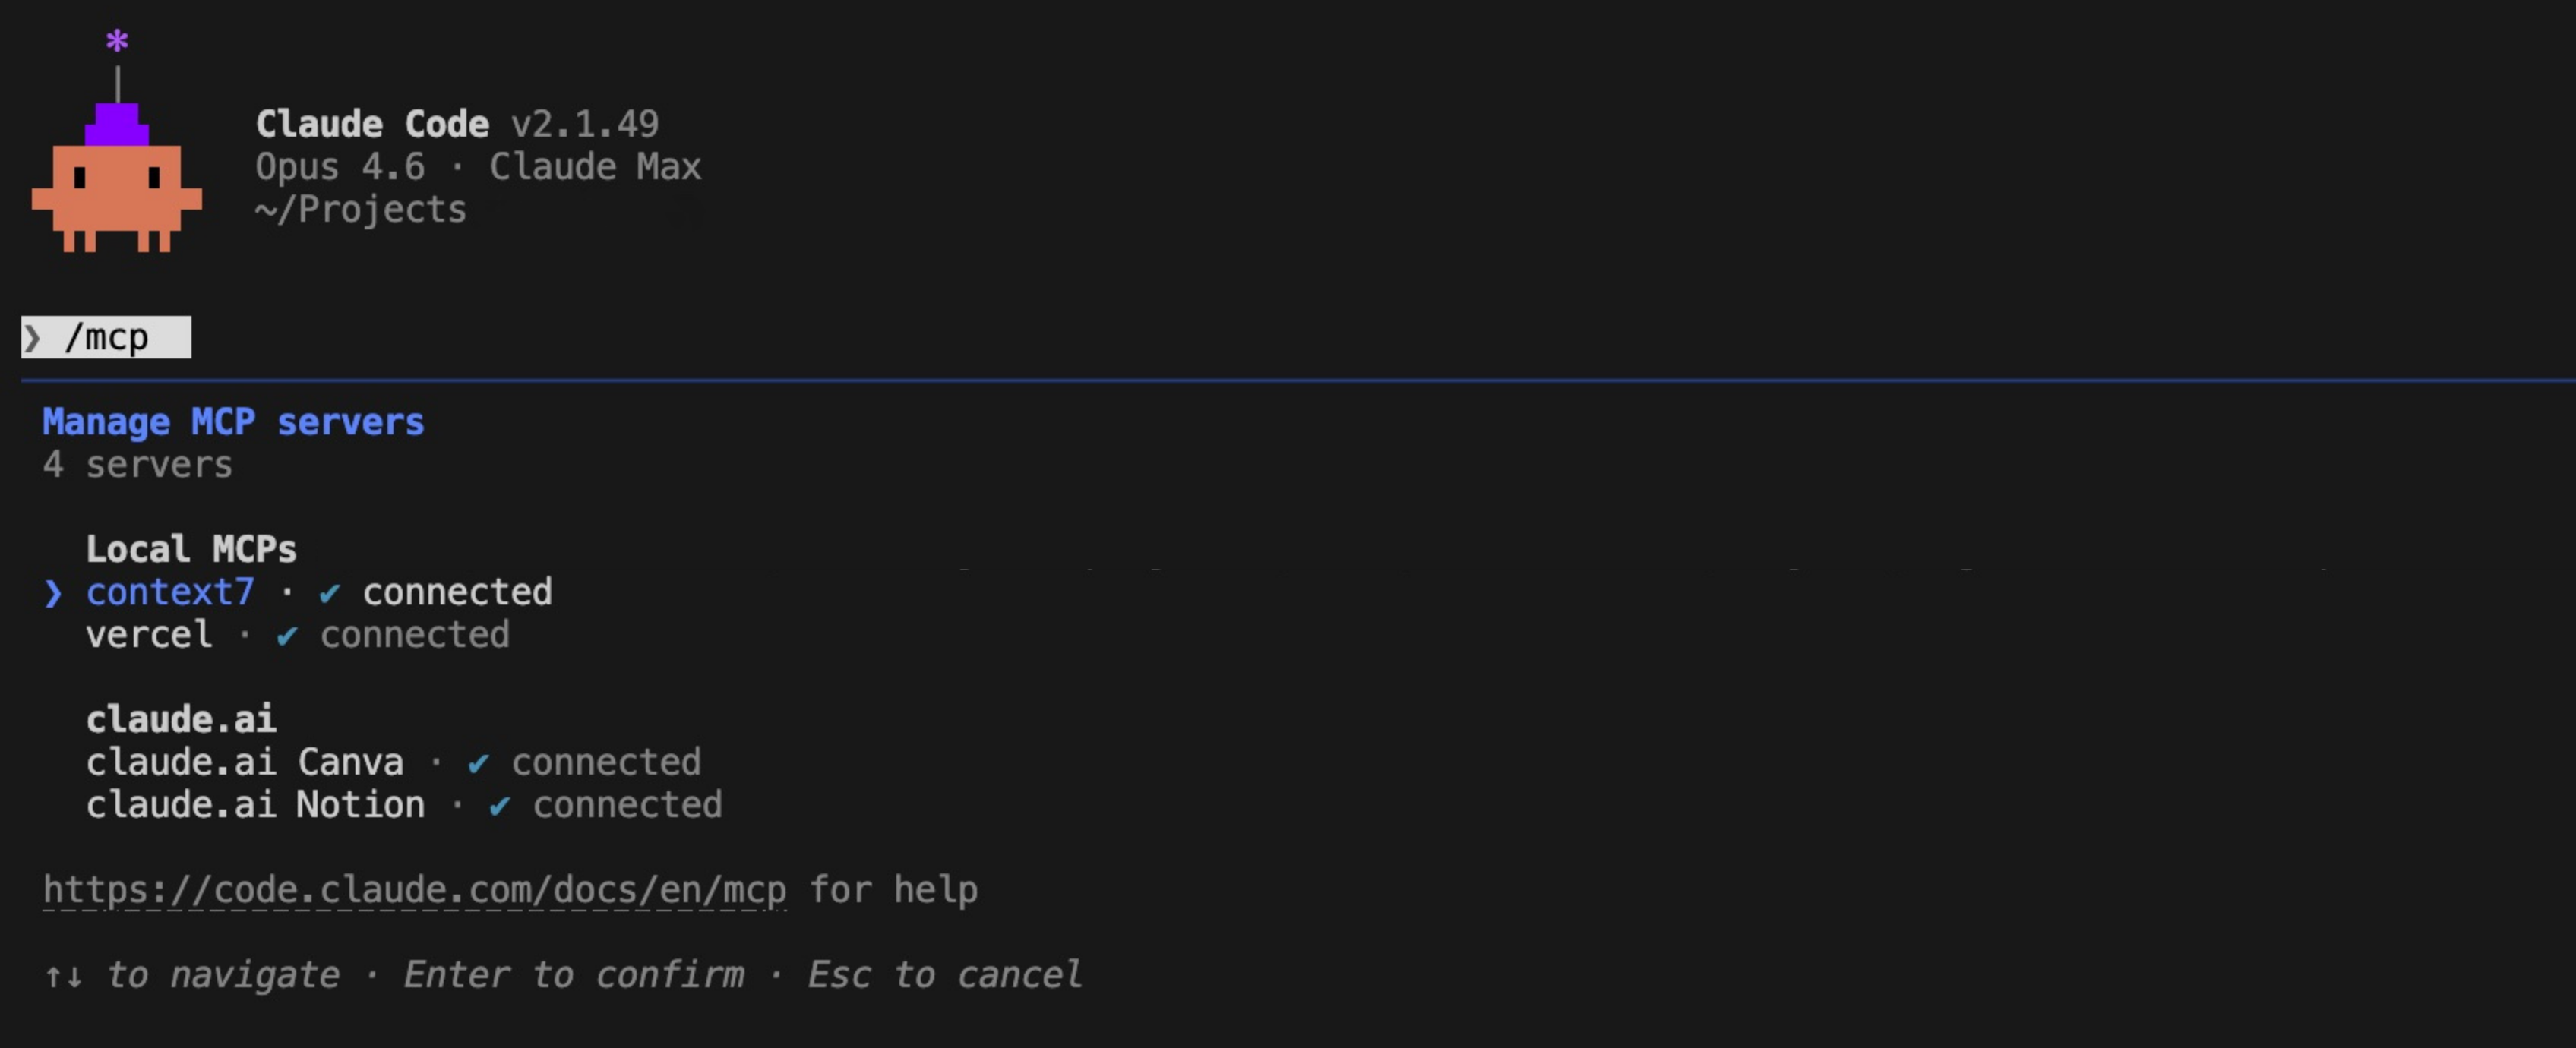
5. Add MCP servers
The Model Context Protocol (MCP) allows Claude Code to easily connect with external tools, extending what it can do beyond just reading and writing files. MCP servers act as plugins that allow Claude to access databases, APIs, browsers, and plenty more - with the ecosystem growing really quickly.
To add an MCP server, just run claude mcp add from your terminal. Once you've got it configured, these servers will persist across sessions and Claude can use them automatically when needed. Here are some of the most useful ones I've come across:
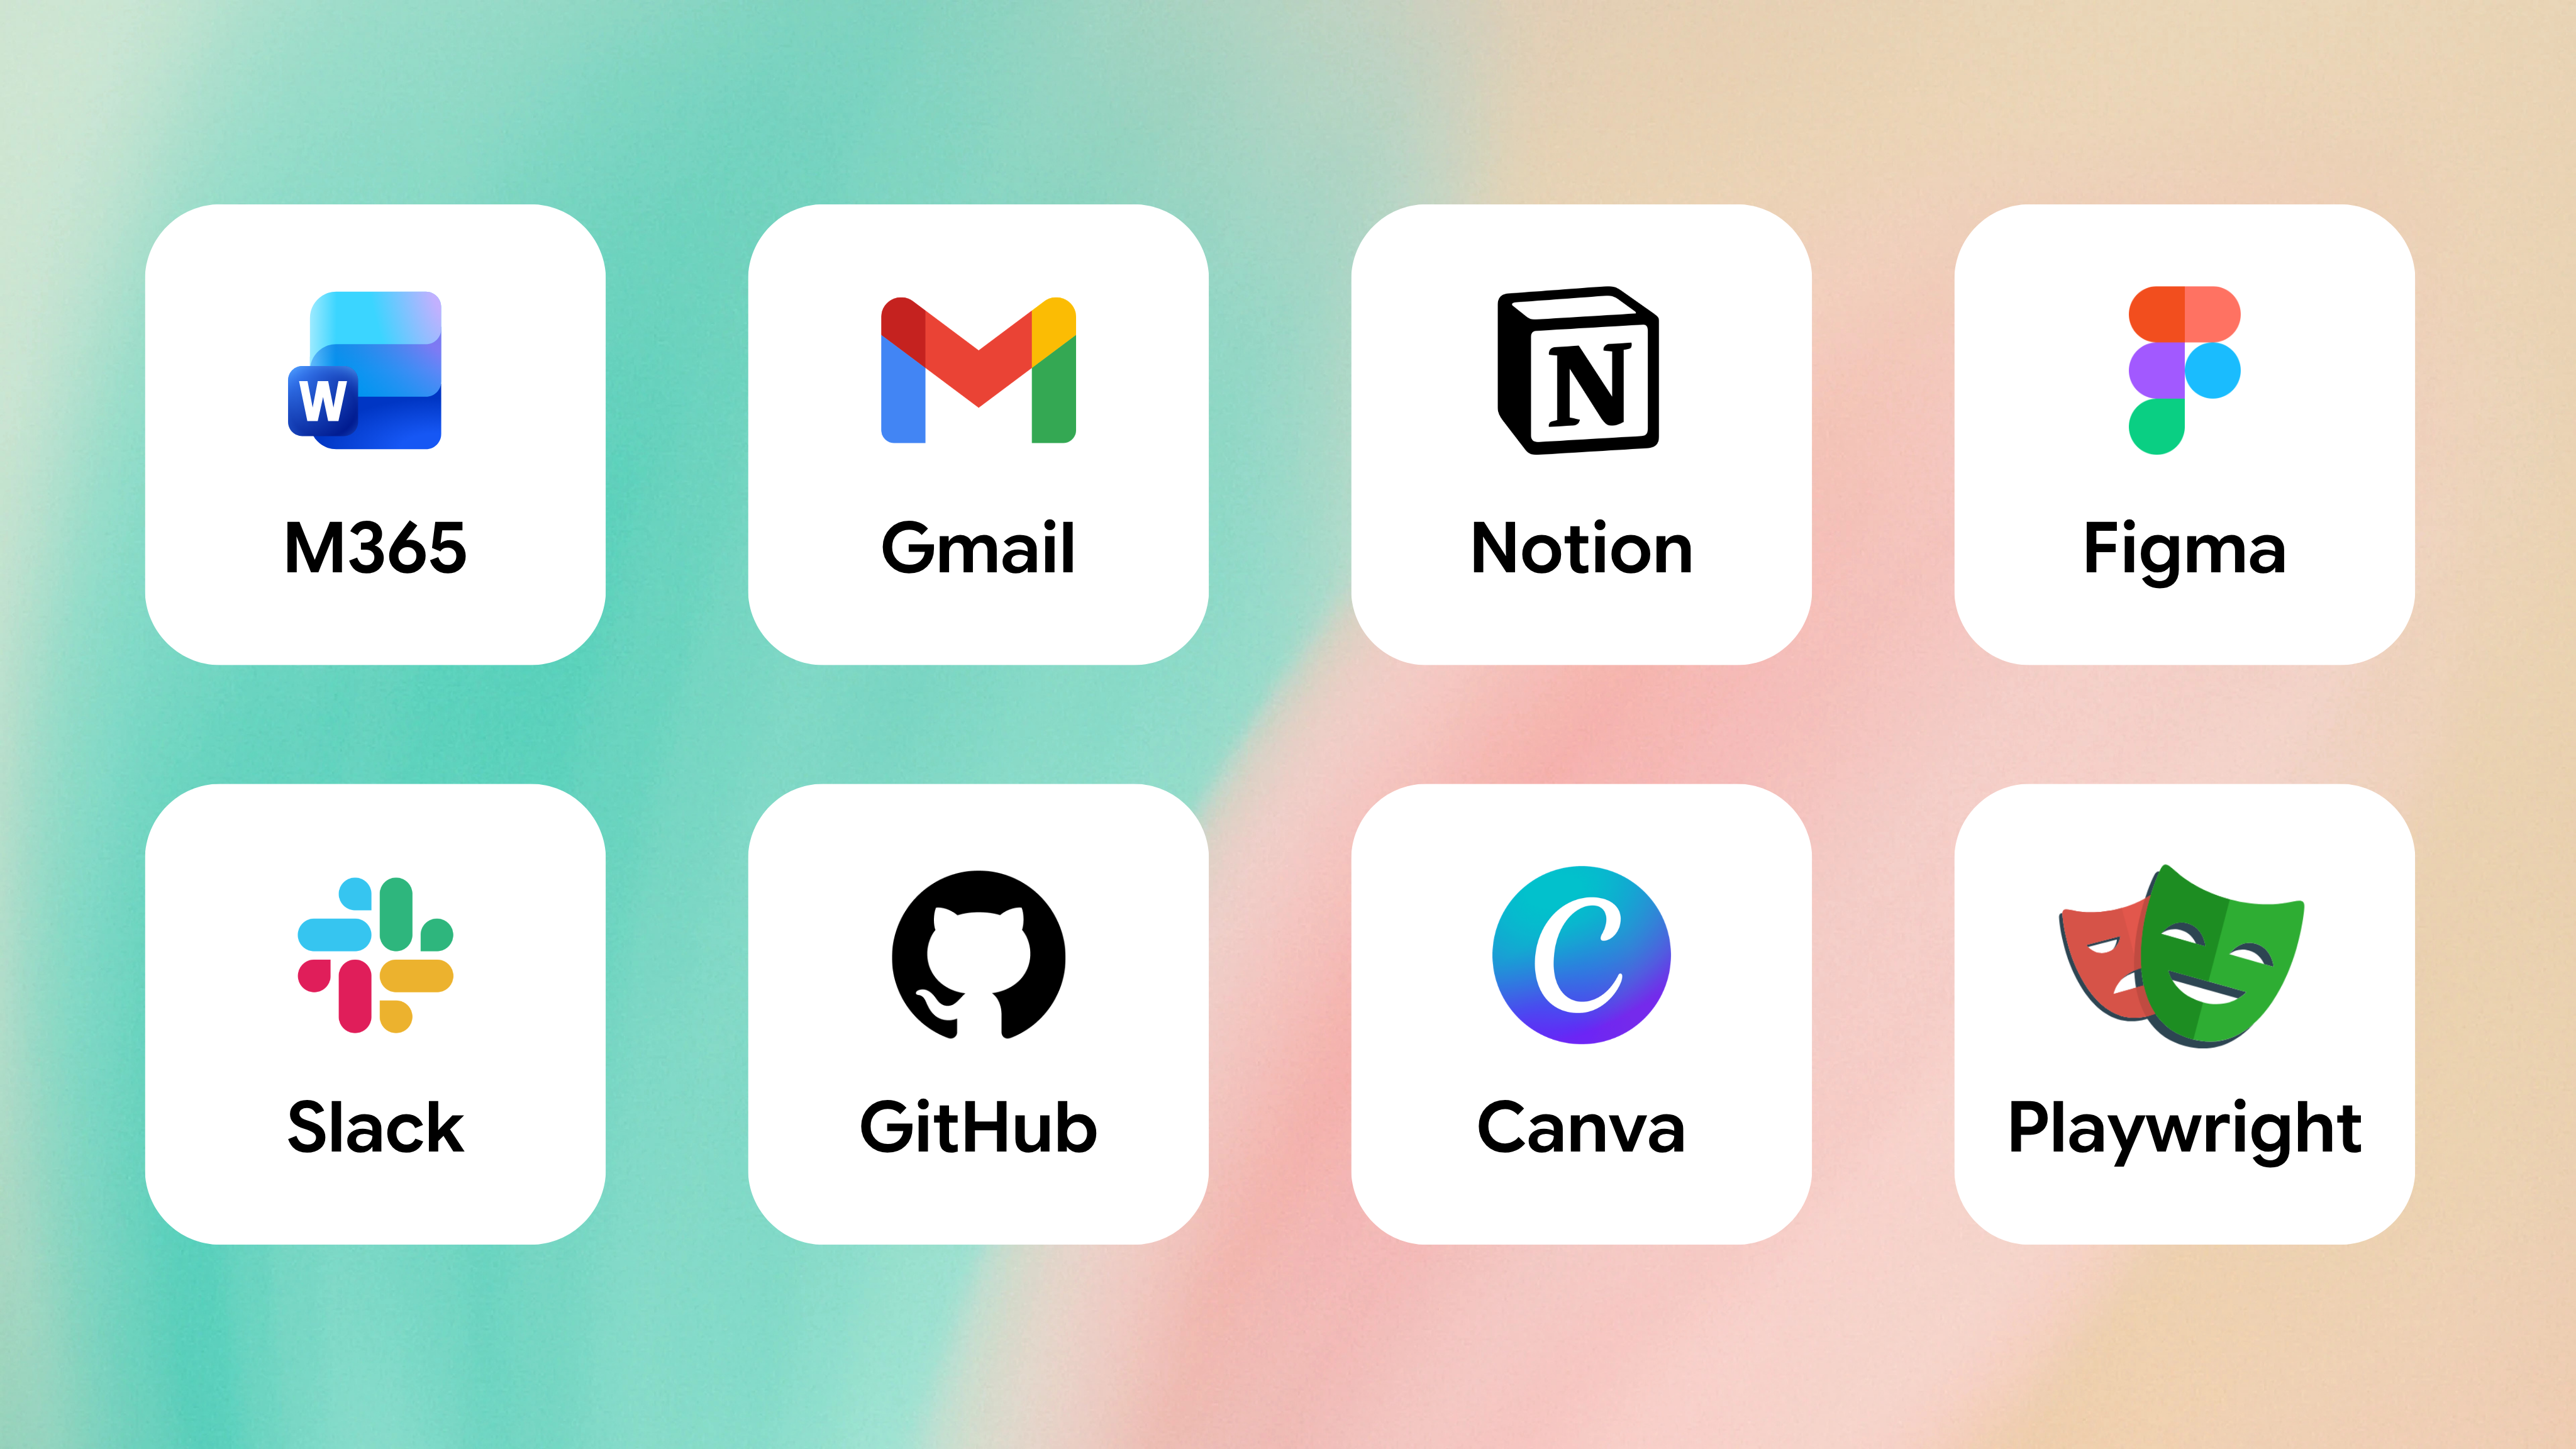
Microsoft 365
Search and analyse your Outlook emails, SharePoint and OneDrive documents, and Teams meeting notes from inside Claude. This allows you to pull insights and answer questions about your work, without having to upload anything manually.
Gmail
Ask Claude to search through your inbox and draft emails for you, without having to leave the terminal.
Notion
Fetch data from your pages and databases, so that your conversations stay grounded in your existing docs.
Figma
Turn your Figma designs into a working website, or convert an existing website's UI into editable Figma frames.
Slack
Pull message history into Claude for context, or have it send updates back to your team. It's really useful when you want to kick off a long task and get the result delivered to your channel.
GitHub
Create PRs, review issues, and manage your branches directly with Claude.
Canva
Generate designs that match your brand kit, then export them in any format you need.
Playwright
Claude can open the website it just built in a real browser, then review it for mistakes and fix them automatically - before it passes the work back to you.
Context7
Fetches up-to-date documentation for popular libraries - like React, Next.js or Vue - so that Claude always has the most recent API documentation and doesn't rely on its training data.
The real power comes from combining multiple servers. You could ask Claude to read a Notion spec, pull the relevant Figma designs, build the feature, run end-to-end tests with Playwright, then open a PR on GitHub - all in a single conversation.
While most MCP servers extend what Claude can do, Playwright is a bit different because it allows Claude to actually see and automatically improve its own work. It's still pretty underused, but it's the first MCP I'd recommend for when you're doing UI work.
Claude will write the UI code for you, open it in a real browser and review the changes, then make improvements until it matches what you asked for. You don't need to constantly reload the page, or compare screenshots between each attempt - Claude can do it all for you.
To set it up, run claude mcp add playwright npx @playwright/mcp@latest to register the server, then npx playwright install to grab the browser binaries. One thing that's worth knowing - you should mention Playwright by name in your prompt, otherwise Claude might fall back and try to control the browser through Bash.
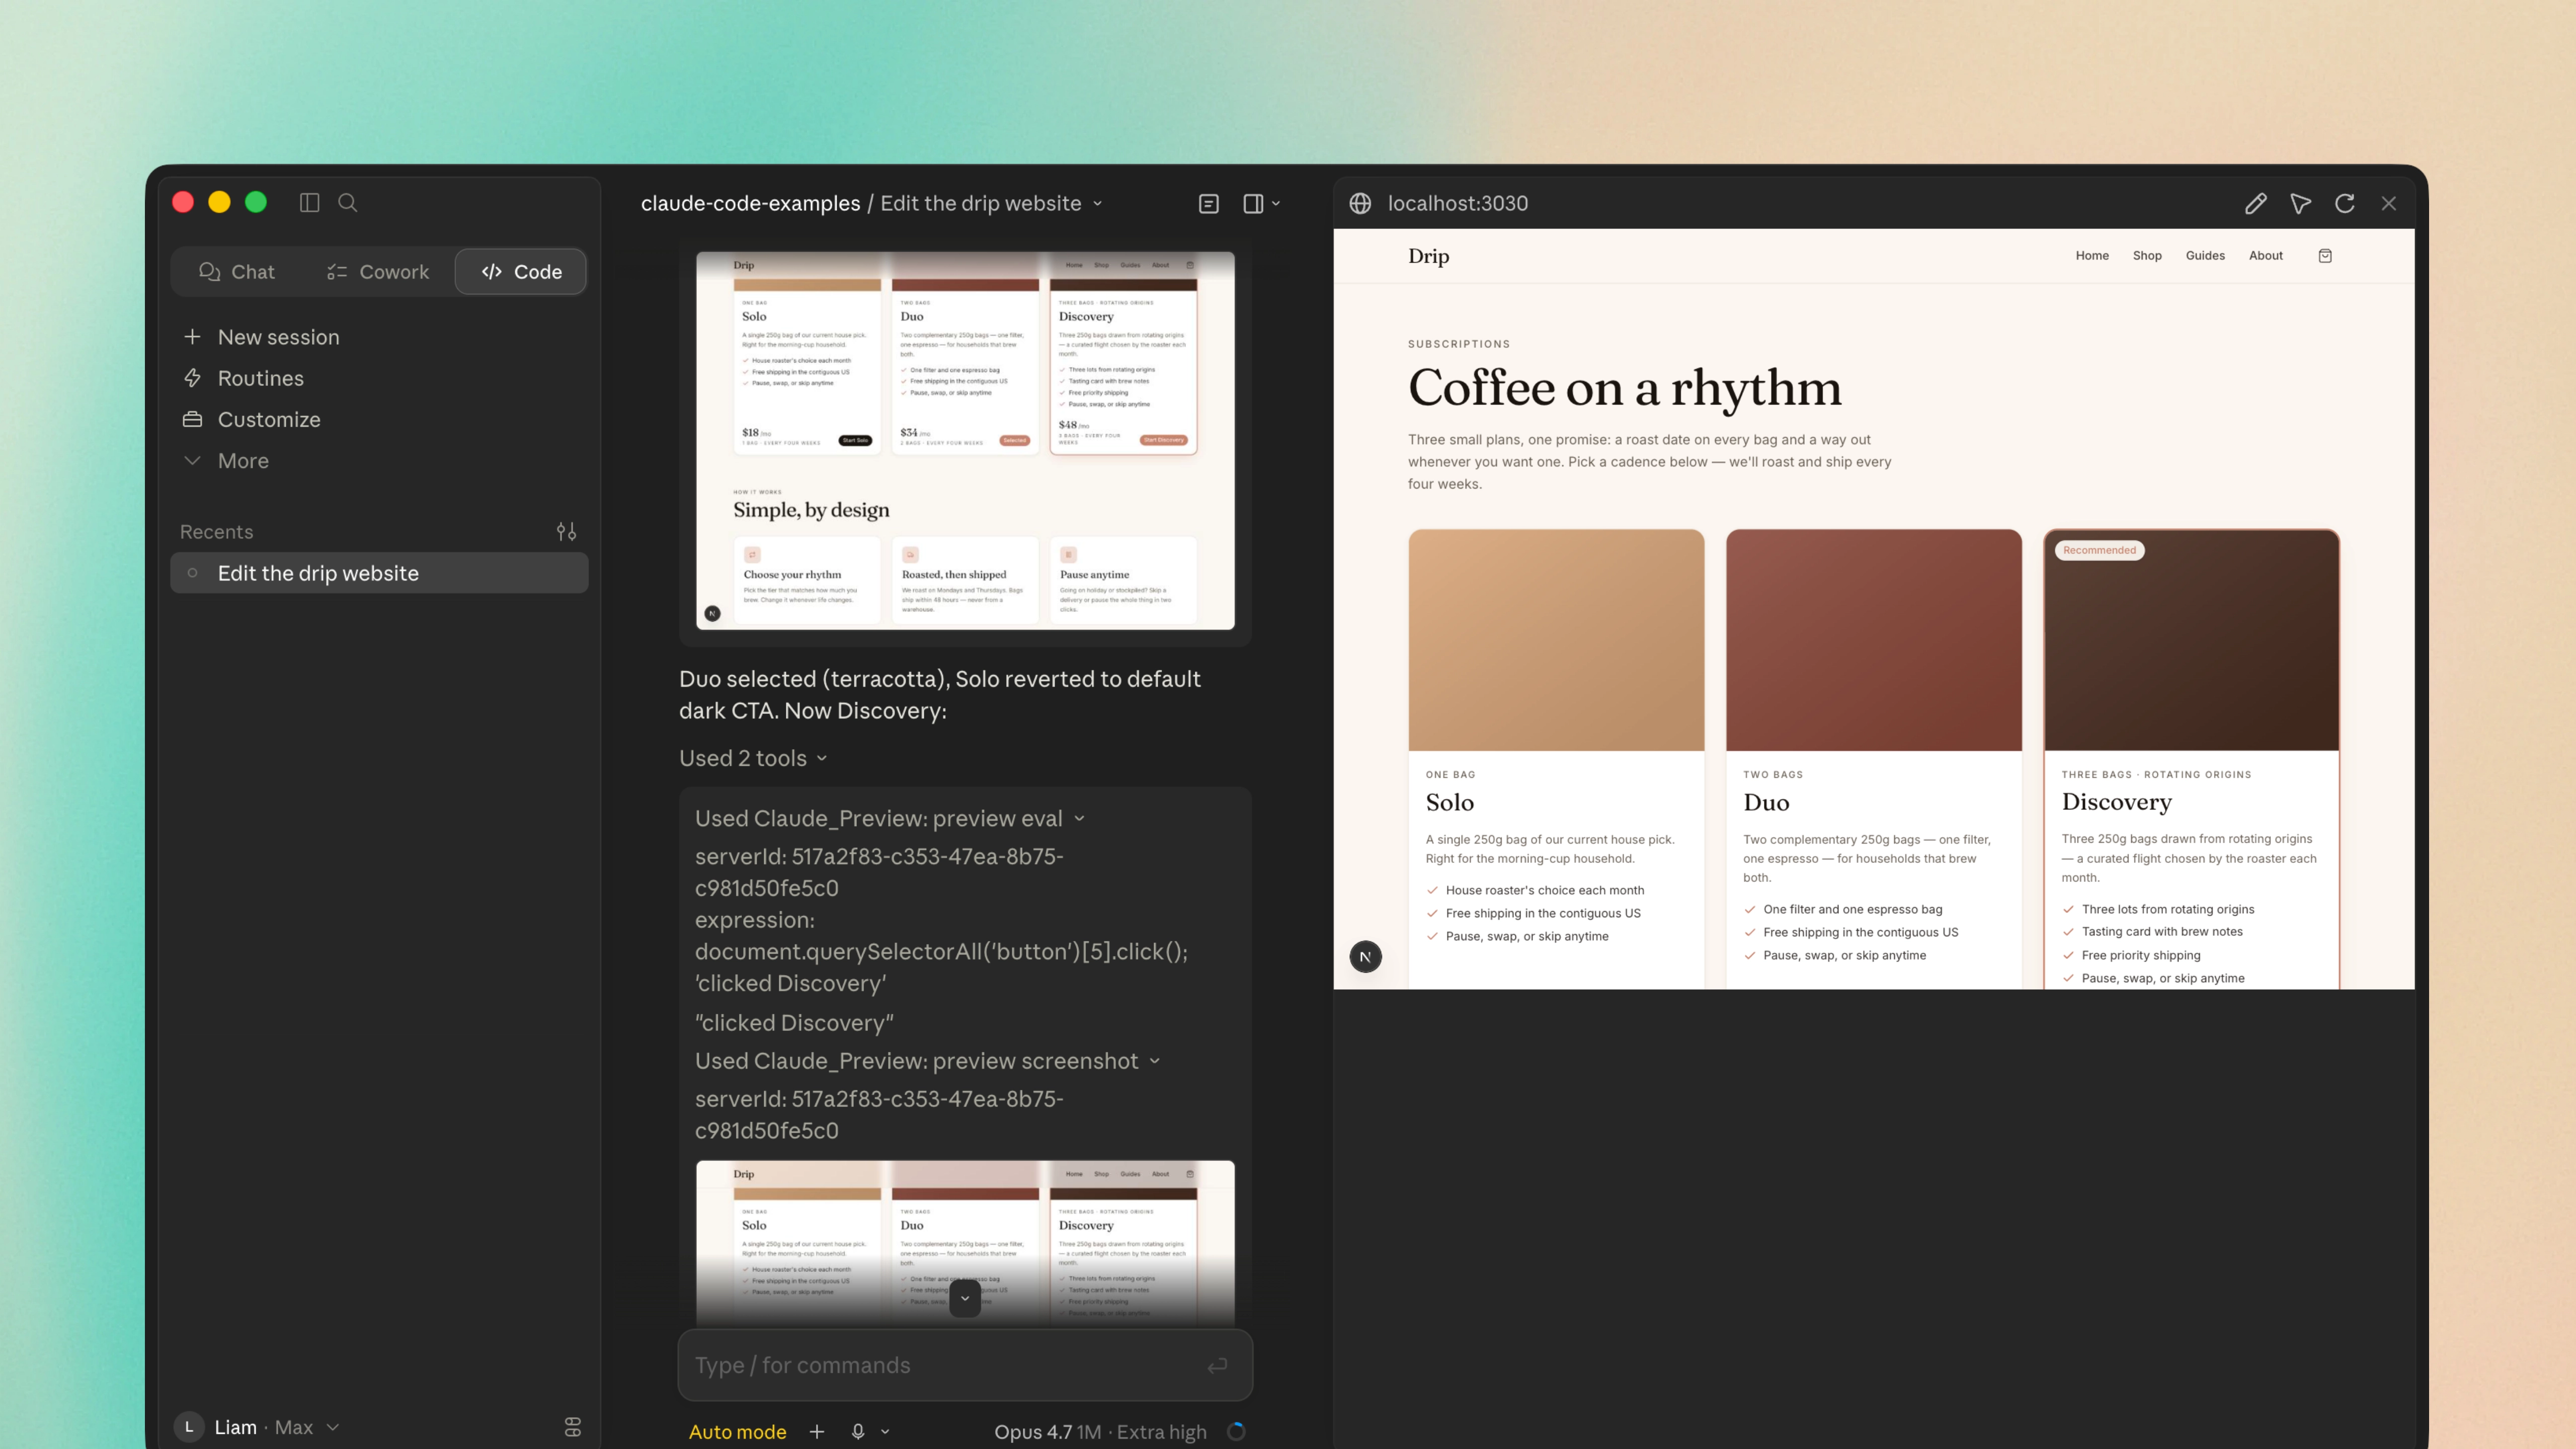
Build a subscriptions page at app/subscriptions/page.tsx with three tiers - Solo (1 bag every four weeks, $18/mo), Duo (2 bags every four weeks, $34/mo), and Discovery (3 bags from rotating origins every four weeks, $48/mo, marked as recommended). Match the design language we're using on the rest of the Drip site. Once you're done, use the Playwright MCP server to open the page and take a screenshot at desktop and mobile widths. Compare it to /shop (grab a screenshot of that page too as a reference) and adjust the styling until the subscriptions page feels consistent. After that, walk through the page interactively - click each tier's CTA button and confirm the hover states feel right.
There are loads of useful workflows you can try, once you've got it running. You can ask Claude to review how a layout looks on different devices, walk through a checkout flow in plain English, or audit your app for accessibility issues. It's not free, as each screenshot and page read will lead to more tokens being used - but for UI work, it's the closest thing to having an extra pair of eyes on your screen.
6. Bring Claude into your GitHub workflow
If you're not a software engineer, you might not have heard about GitHub before. It's used by software teams to store their code, develop new features, and review each other's changes.
Each project sits in a "repository" (or "repo" for short), developers then propose a change through "pull requests" (PRs), and "issues" are used to report bugs or request new features. The team will then review these changes, add comments, and then approve it.
You can bring Claude into your GitHub workflow as a virtual teammate - allowing it to live inside your repo, pick up tasks when you tag @Claude in a comment, and keep things moving even when you're not at your laptop. This means that you can tag @Claude on a ticket on a Friday afternoon, head off for the weekend, and then come back to a draft PR.
You can also have Claude review every new PR as soon as it's opened, so that it can catch any obvious mistakes before they reach your team. To set it up, just run /install github app inside Claude Code and install it on your repo - two GitHub Actions will then be added automatically and can handle the rest.
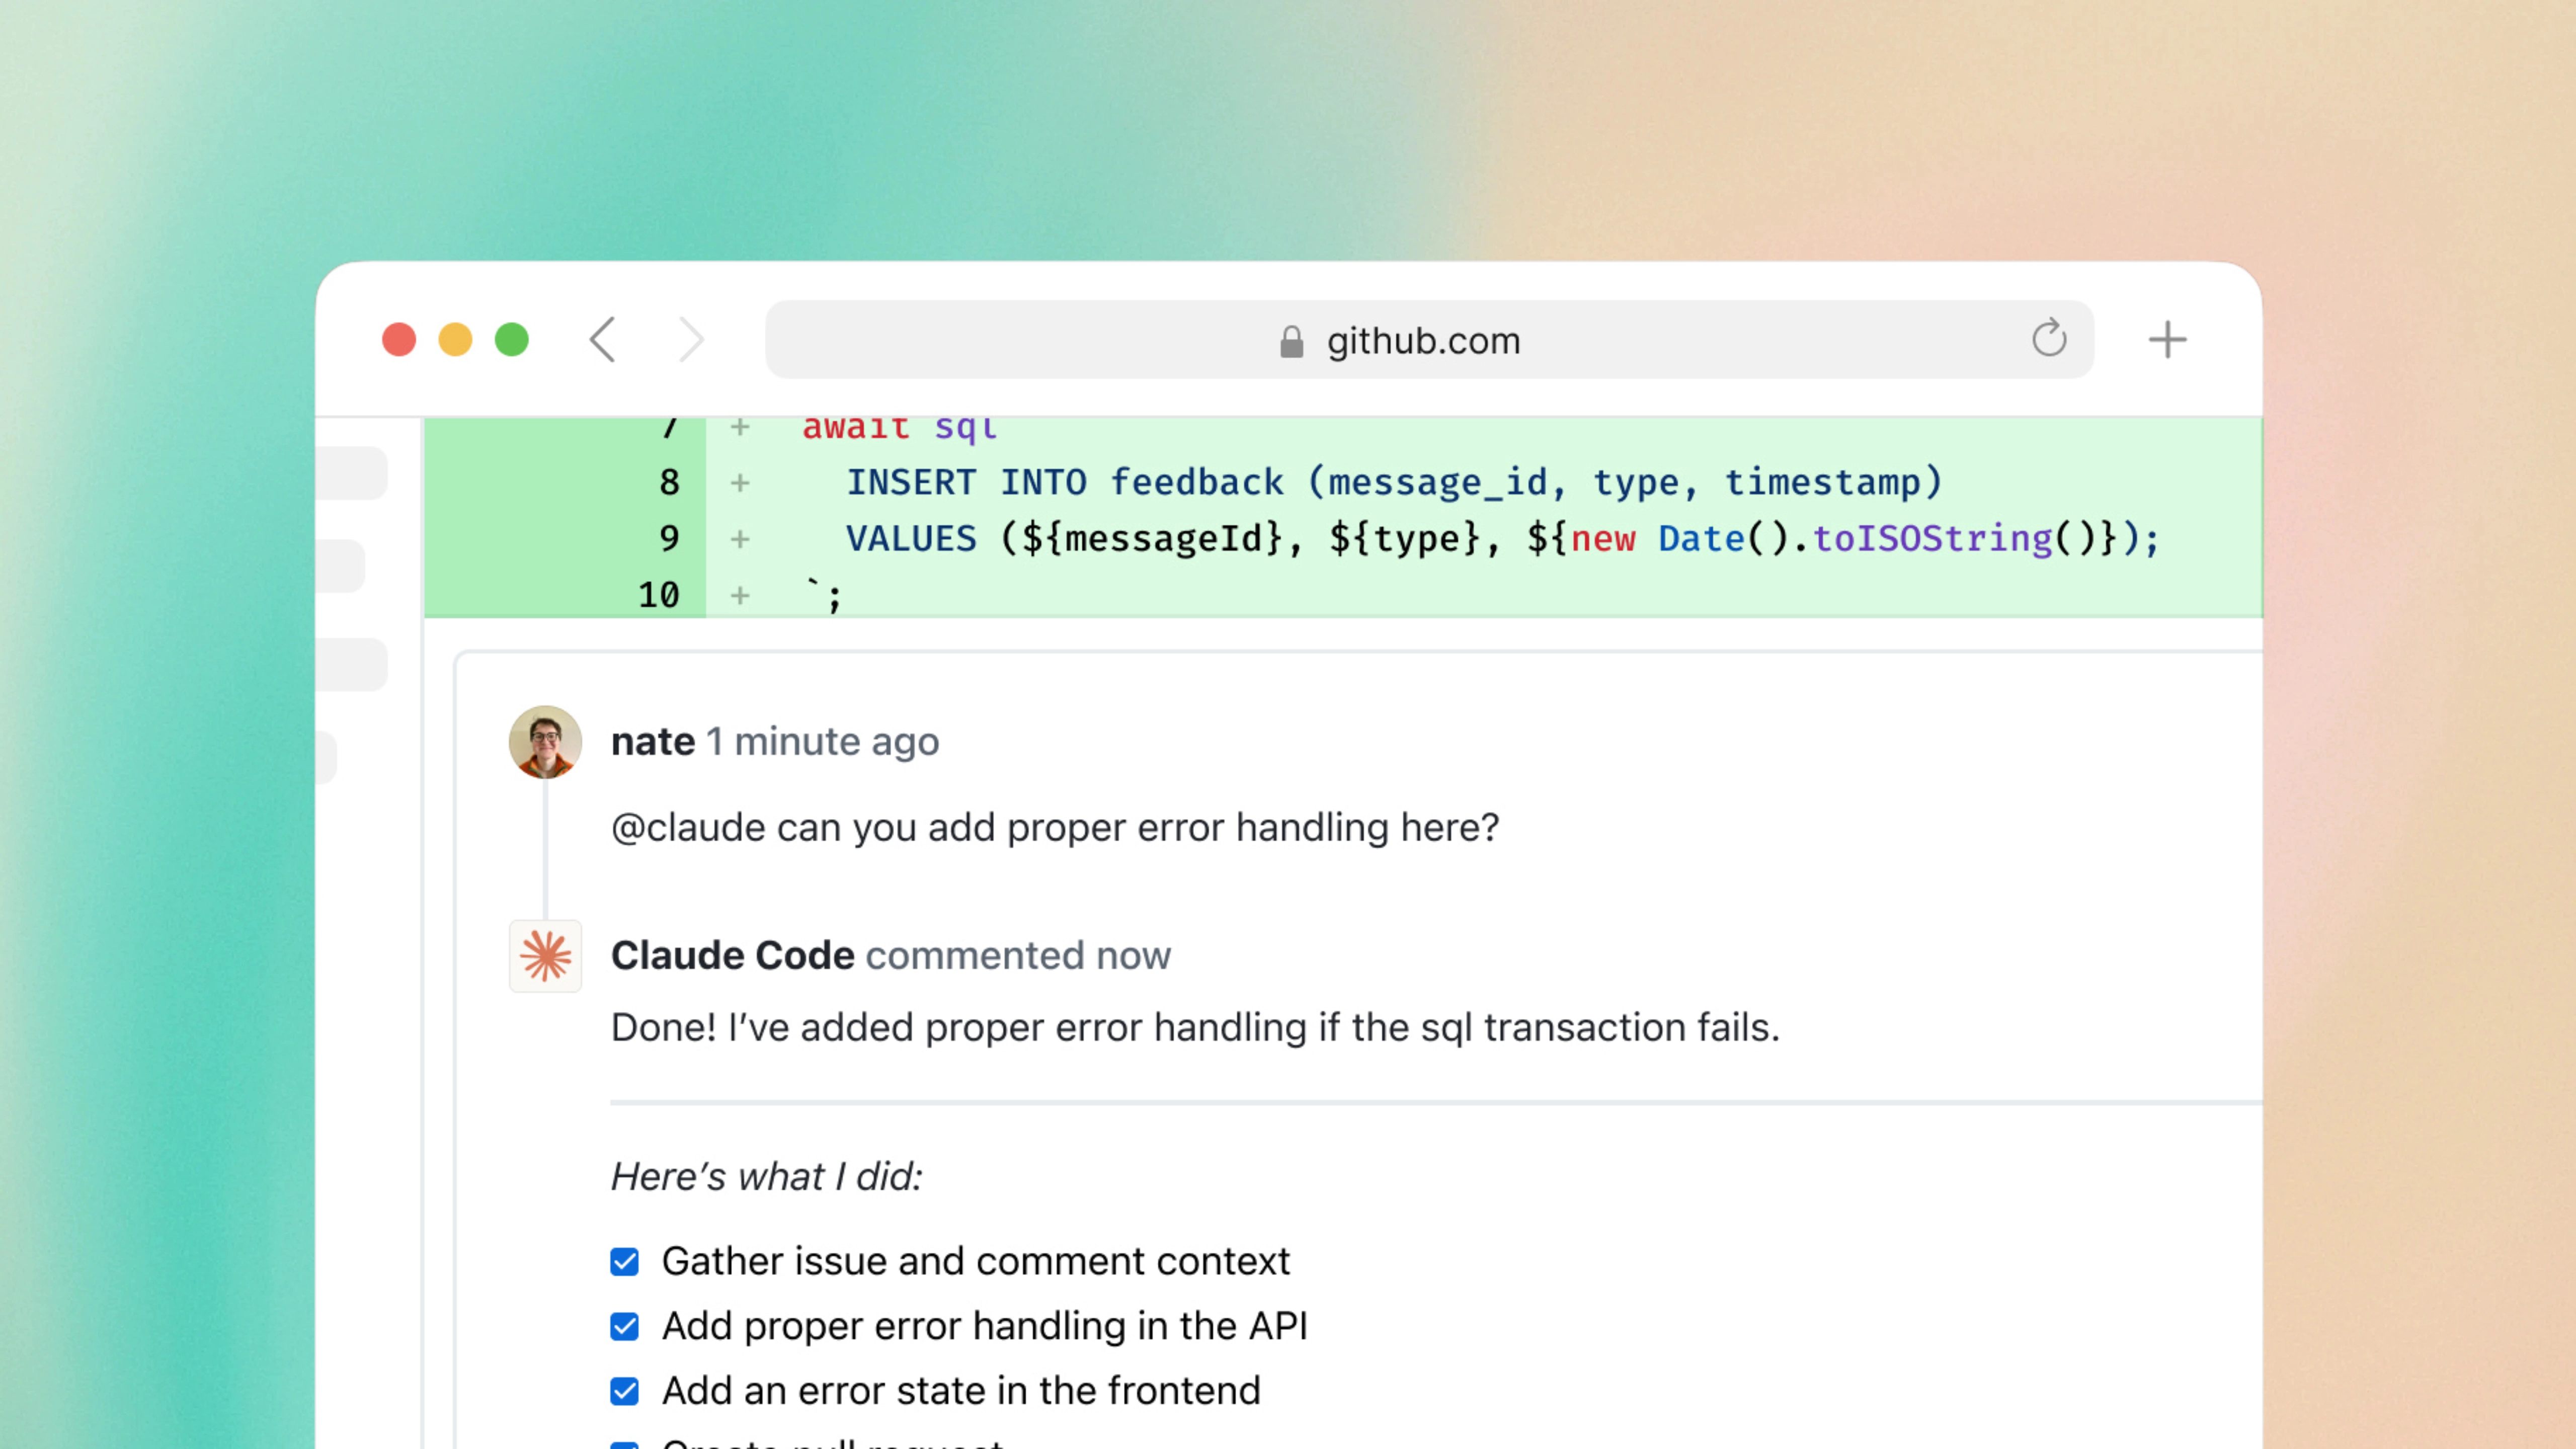
@Claude there's a broken anchor link in the README under the "Getting started" section - the one pointing to docs/installation.md. Can you find it, fix it, and open a PR? Keep the change minimal and don't touch anything else in the README.
These two GitHub Actions can be customised using the .github/workflows config files. You can also give Claude access to MCP servers inside the Action itself - so you could run Playwright for visual regression tests, or connect to Sentry and pull live errors into a PR review. It's worth noting that every tool permission has to be listed explicitly in the workflow, you can't have any wildcards or shortcuts for what Claude can access.
Bringing Claude into your GitHub workflow is incredibly useful for both teams and individuals - as you've essentially got an extra pair of hands that can pick up issues when you're working on something else, review PRs before they reach you, and (paired with a strict review checklist, which I cover when we get to slash commands) allows you to focus on the harder problems.
7. Set up your project with CLAUDE.md
If you're going to be using Claude Code regularly on a project, you should create a CLAUDE.md file and store it in the root of your project. This file is automatically loaded into Claude's context at the start of every session, giving it constant knowledge about your codebase and how it's structured.
The easiest way to get started is to run /init inside Claude Code. It'll analyse your project and generate a starter CLAUDE.md file - which is based on how your codebase works, your test framework, and the patterns you use. It's not always perfect, but it will give you a solid foundation that you can improve over time.
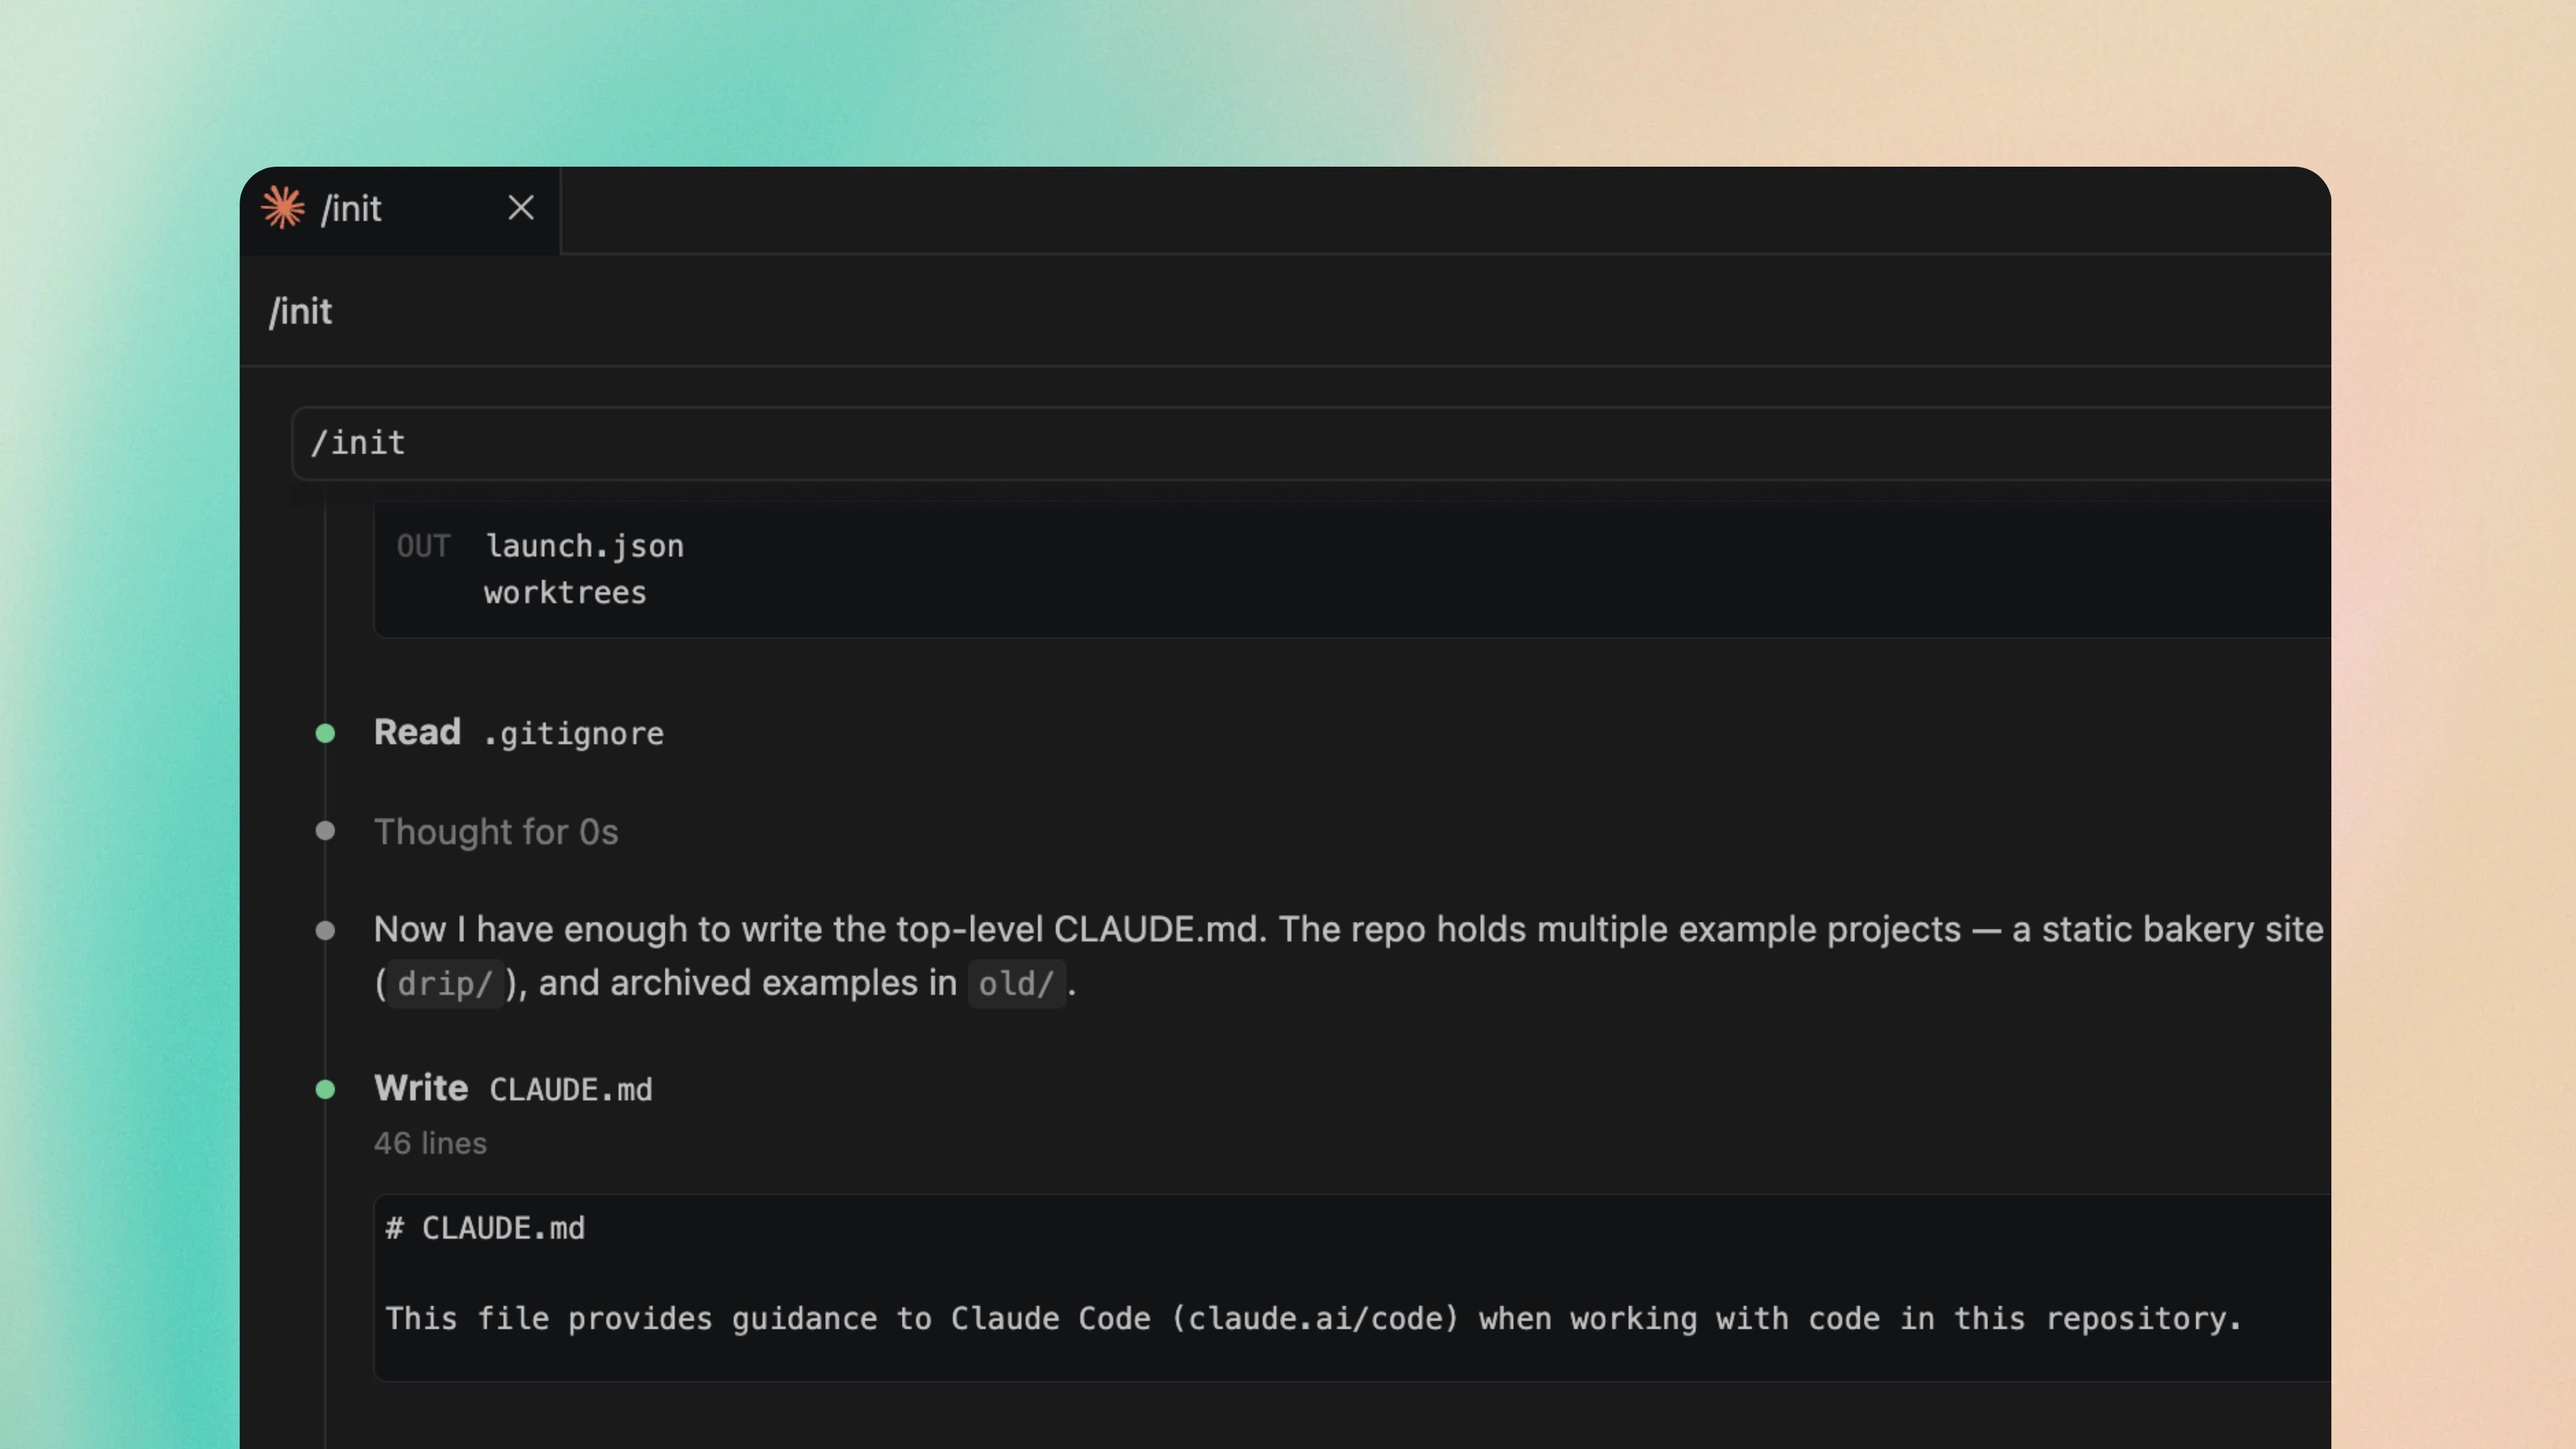
You should think of it as onboarding documentation for an AI teammate. Without it, Claude will start every conversation from scratch and then has to figure out your project's conventions on its own - which will lead to more mistakes and more time spent correcting things.
A good CLAUDE.md file should include:
##Build and run commands
how to start the dev server, run tests, build for production
##Code style guidelines
naming conventions, how to order your imports, different component patterns
##Architecture decisions
why you chose specific libraries, conventions for the folder structure
##Common pitfalls
things that are easy to get wrong in your specific codebase
# CLAUDE.md ## Build Commands - npm run dev - Start development server - npm run build - Build for production - npm run test - Run test suite - npm run lint - Lint codebase ## Code Style - Use functional components with TypeScript interfaces for props - Imports: React first, then components, then utils - Use Tailwind with cn() utility for class merging - Follow shadcn/ui component patterns with forwardRef ## Architecture - State management: React Context API (no Redux) - Styling: Tailwind CSS with shadcn/ui components - API routes: Next.js App Router with route handlers - Database: Prisma ORM with PostgreSQL ## Important Notes - Always use the "use client" directive for components with hooks - Keep server components as the default in app/ directory - Use next/image for all images (required for optimisation)
It's important that you keep the CLAUDE.md file concise. If your it gets too long, Claude will start ignoring half of it - so you should only keep the lines that prevent mistakes and cut everything else.
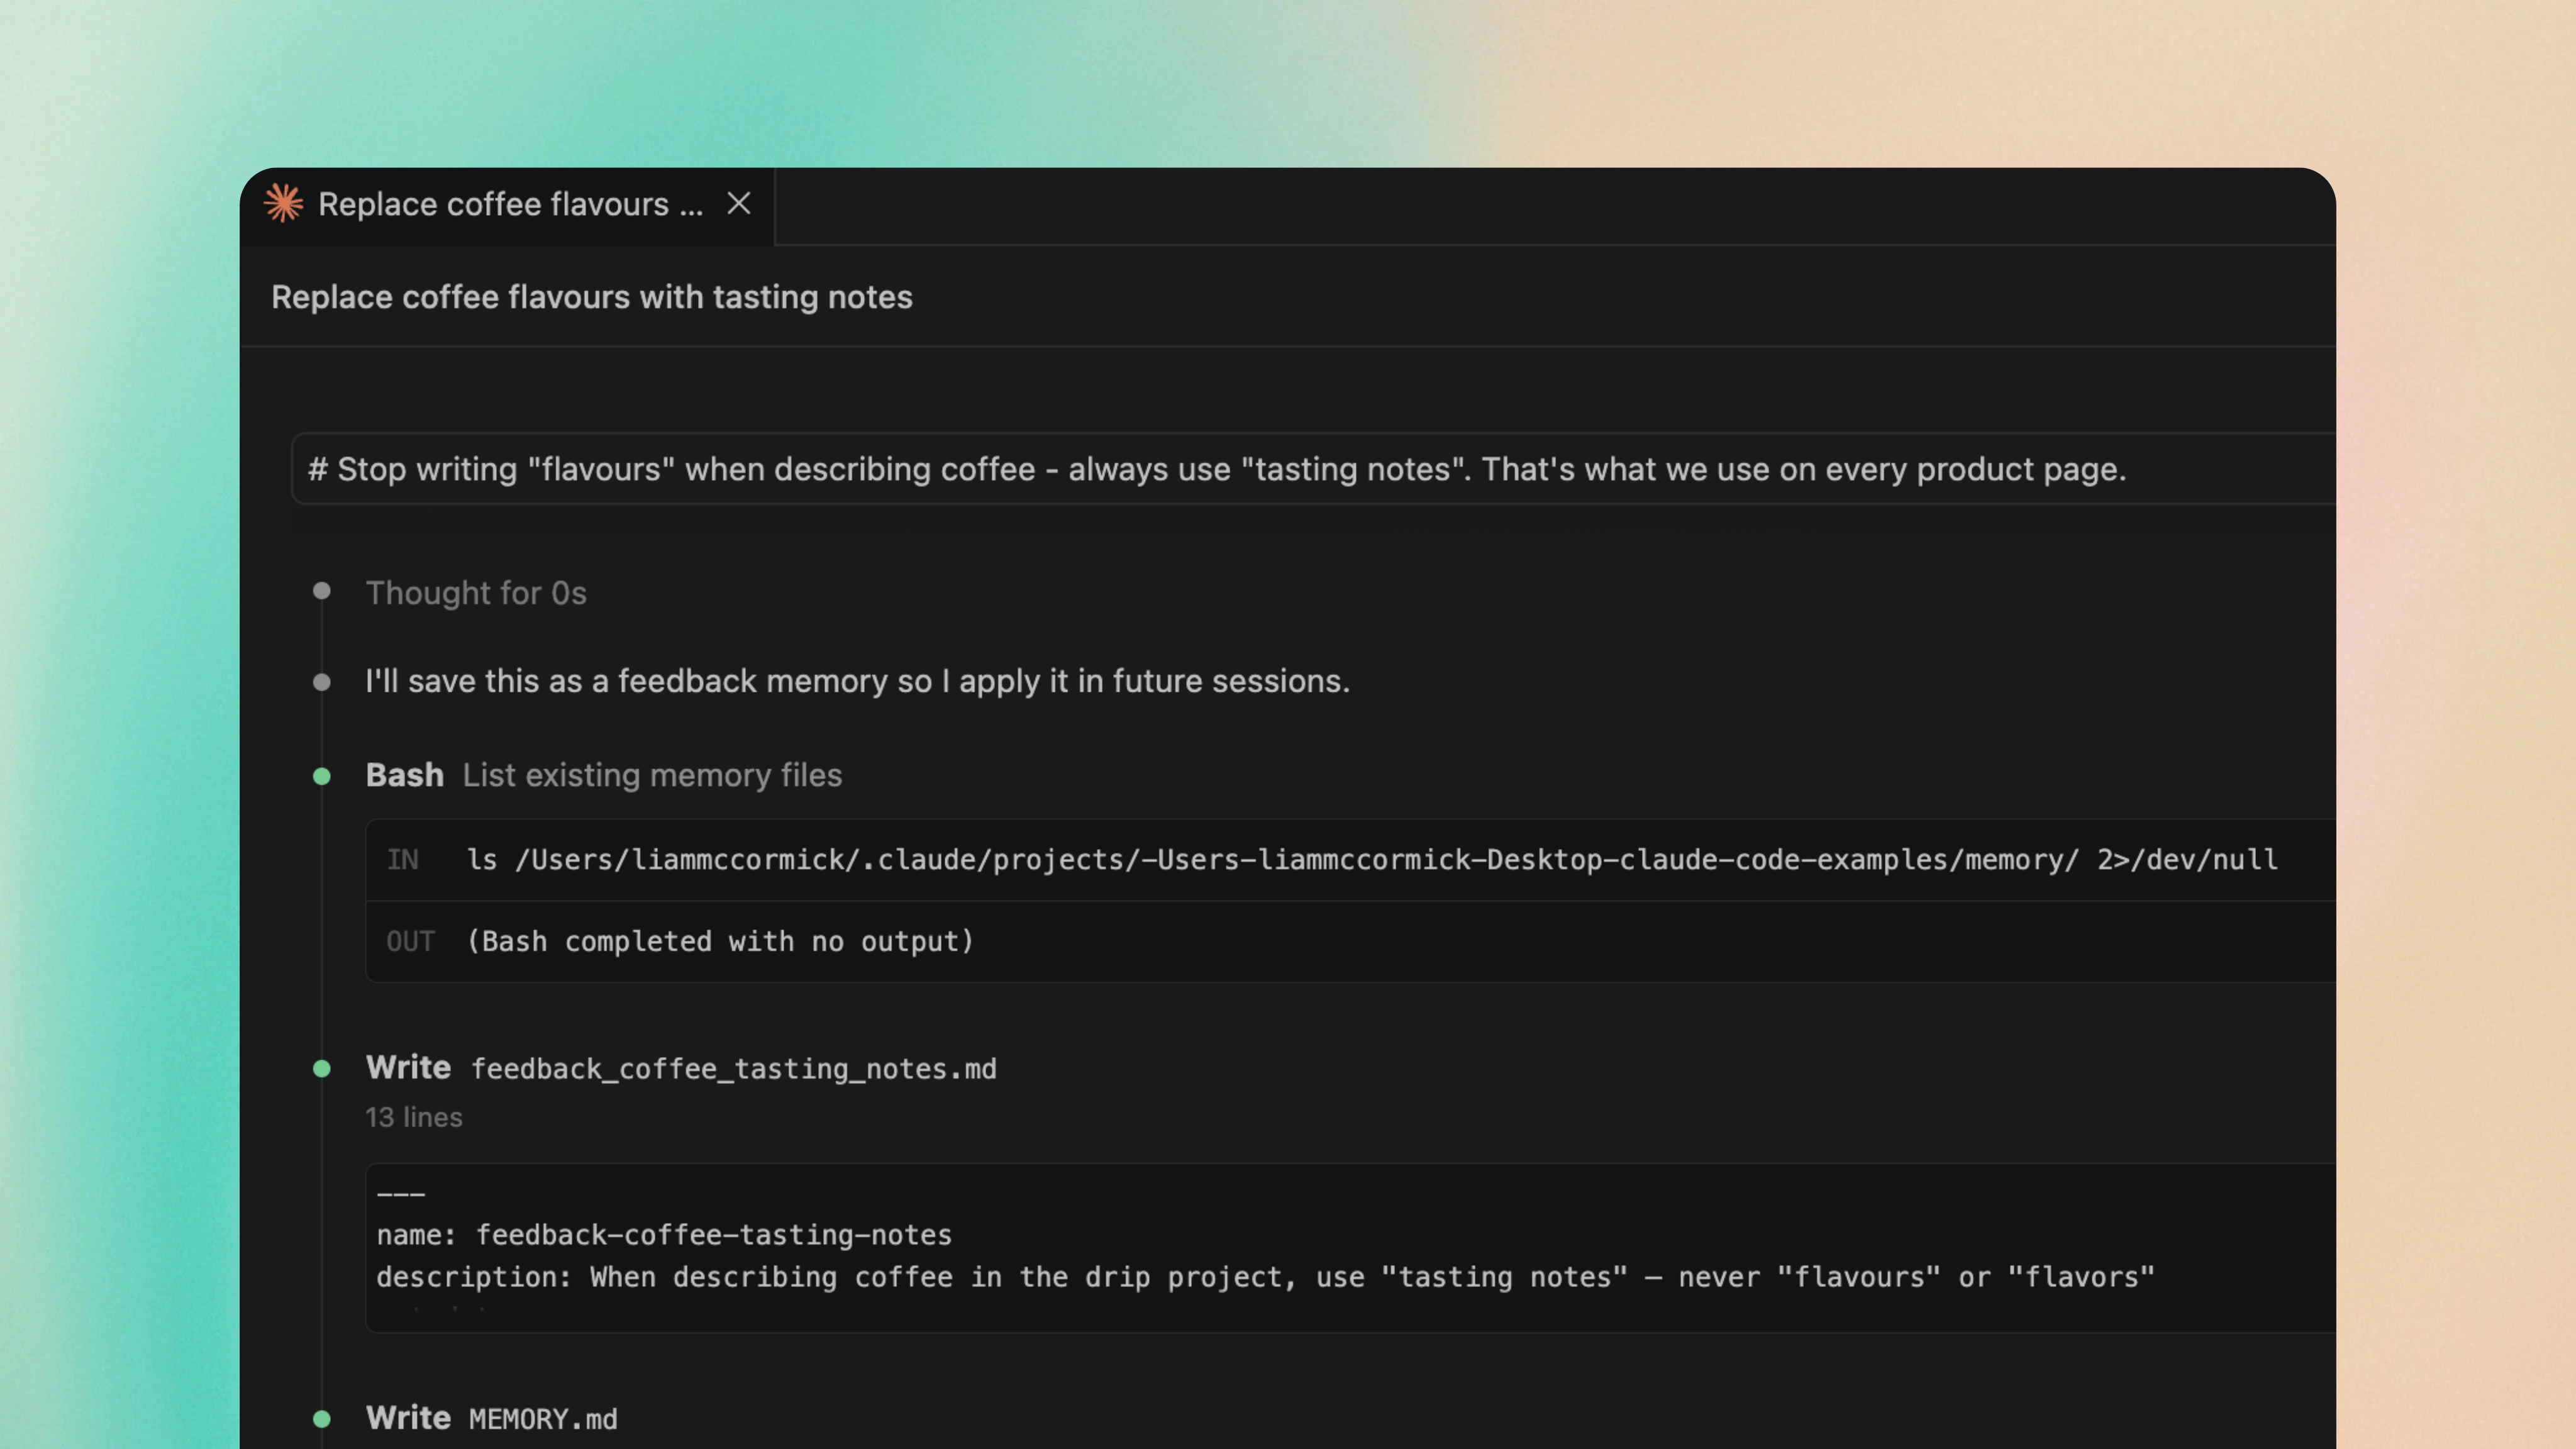
A nice way to improve your CLAUDE.md over time is to use memory mode. If you notice that Claude keeps making the same mistake, you can hit # directly in the chat and add a new rule. Claude will figure out the right CLAUDE.md to update (project, user-level, or a subdirectory file) and then add the rule for you. It means that you can add corrections as they happen, rather than trying to write the perfect version upfront.
You can also create CLAUDE.md files in subdirectories for instructions that are specific to one area. For example, a components/CLAUDE.md might describe your component patterns in more detail, while a tests/CLAUDE.md could explain your testing conventions.
8. Create custom slash commands
If you find yourself typing the same prompts over and over, slash commands allow you to save these prompts and re-use them at another time. This means that you can write the perfect prompt once, and quickly invoke it again with a single command.
Here are some examples of where they're useful:
/reviewRun every diff through your team's review checklist before you open a PR.
/prTurn the diff into a structured summary, test plan, and any screenshots.
/commitFormat every commit in your team's preferred style (conventional commits, ticket numbers, the works).
/testsScaffold unit tests for a function, component, or file using your existing test patterns.
/auditCheck the latest changes against a project-specific checklist before they go out.
/scaffoldKick off a new component, API route, or migration with your project's conventions baked in.
/debugPaste in a stack trace or failing test and have Claude trace through the code to find the root cause.
/explainDrop in a file or function and get a walkthrough of what it does and how it fits into the wider system.
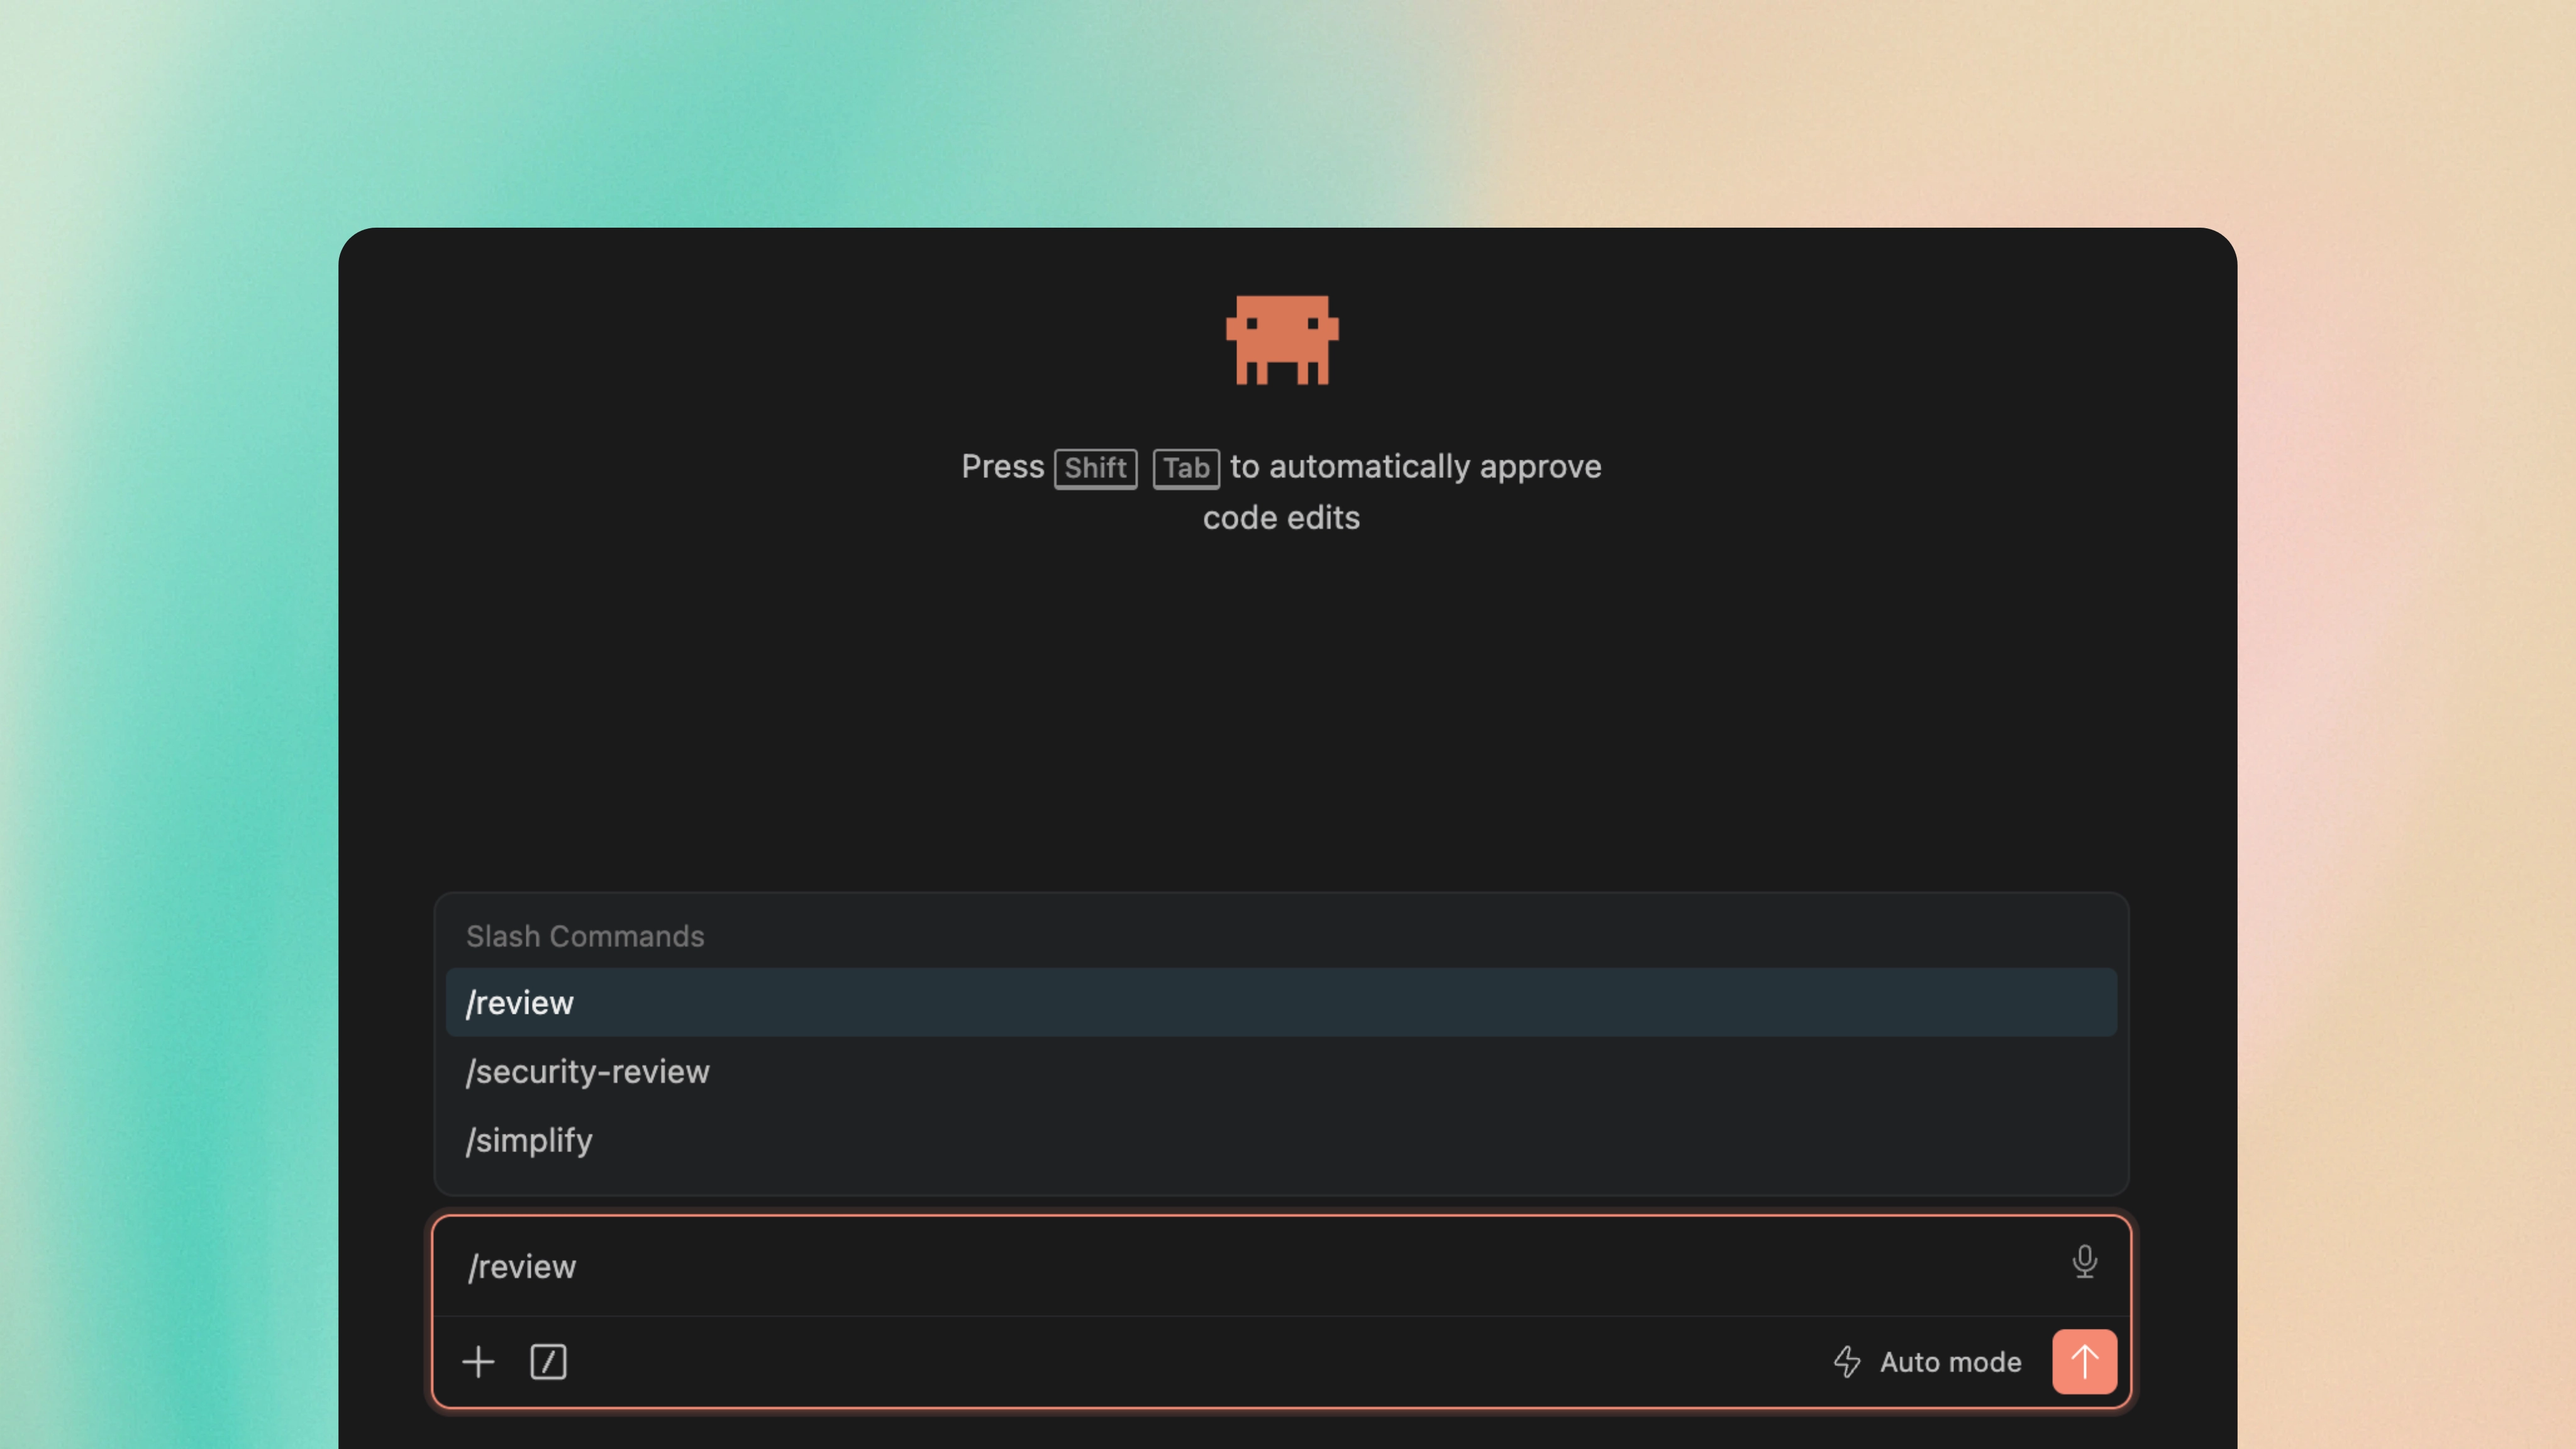
To do this, you simply create a markdown file inside .claude/commands/ at the root of your project. The filename will become the command - so review.md becomes /review. When you invoke the command, the file's content is immediately sent to Claude as the prompt.
## Changed files !`git diff --name-only` ## Detailed changes !`git diff` Review the changes in $ARGUMENTS for potential issues. Focus on: - Logic errors and edge cases - Error handling gaps - Security vulnerabilities (injection, auth bypass, data exposure) - Performance issues (N+1 queries, unnecessary re-renders, missing memoisation) - Whether the code follows our existing patterns and conventions For each issue found, explain the risk and suggest a fix. If everything looks good, confirm that too.
The !`` syntax is quite useful, as it embeds the shell output directly into your prompt. When you run this command, Claude can automatically see the current git diff without you having to paste it in. This is what makes slash commands so powerful - they can pull in the latest context every time they're run.
Notice the $ARGUMENTS placeholder - this gets replaced with whatever you type after the command. So running /review payment-form.tsx will automatically include that filename in the prompt.
/review components/checkout/payment-form.tsx
Since these command files live in your project directory, you can commit them to git and share these workflows with your team. It's a really powerful way to ensure there's consistency across the board - as everyone will run the same code review checklist, the same PR description template, and the same pre-commit checks.
You can also create personal commands in ~/.claude/commands/ for workflows that you want to make available across all of your projects. These show up as /command-name alongside any project commands, and are great for storing your personal preferences.
This ties in with what I said at the very start of this guide - the best prompts are specific and include plenty of detail. With slash commands, you can invest time writing the perfect prompt once and then reuse it forever. Once you've built a prompt that consistently gives you great results, you should save it as a command.
9. Create your own skills
If slash commands are where you start automating your prompts, skills are the next step. They work in a similar way - they're reusable instructions you write once - but Claude applies them automatically when it recognises the task. This means that you don't need to type /review as often, because Claude can spot that you're asking for a review and load the skill on its own.
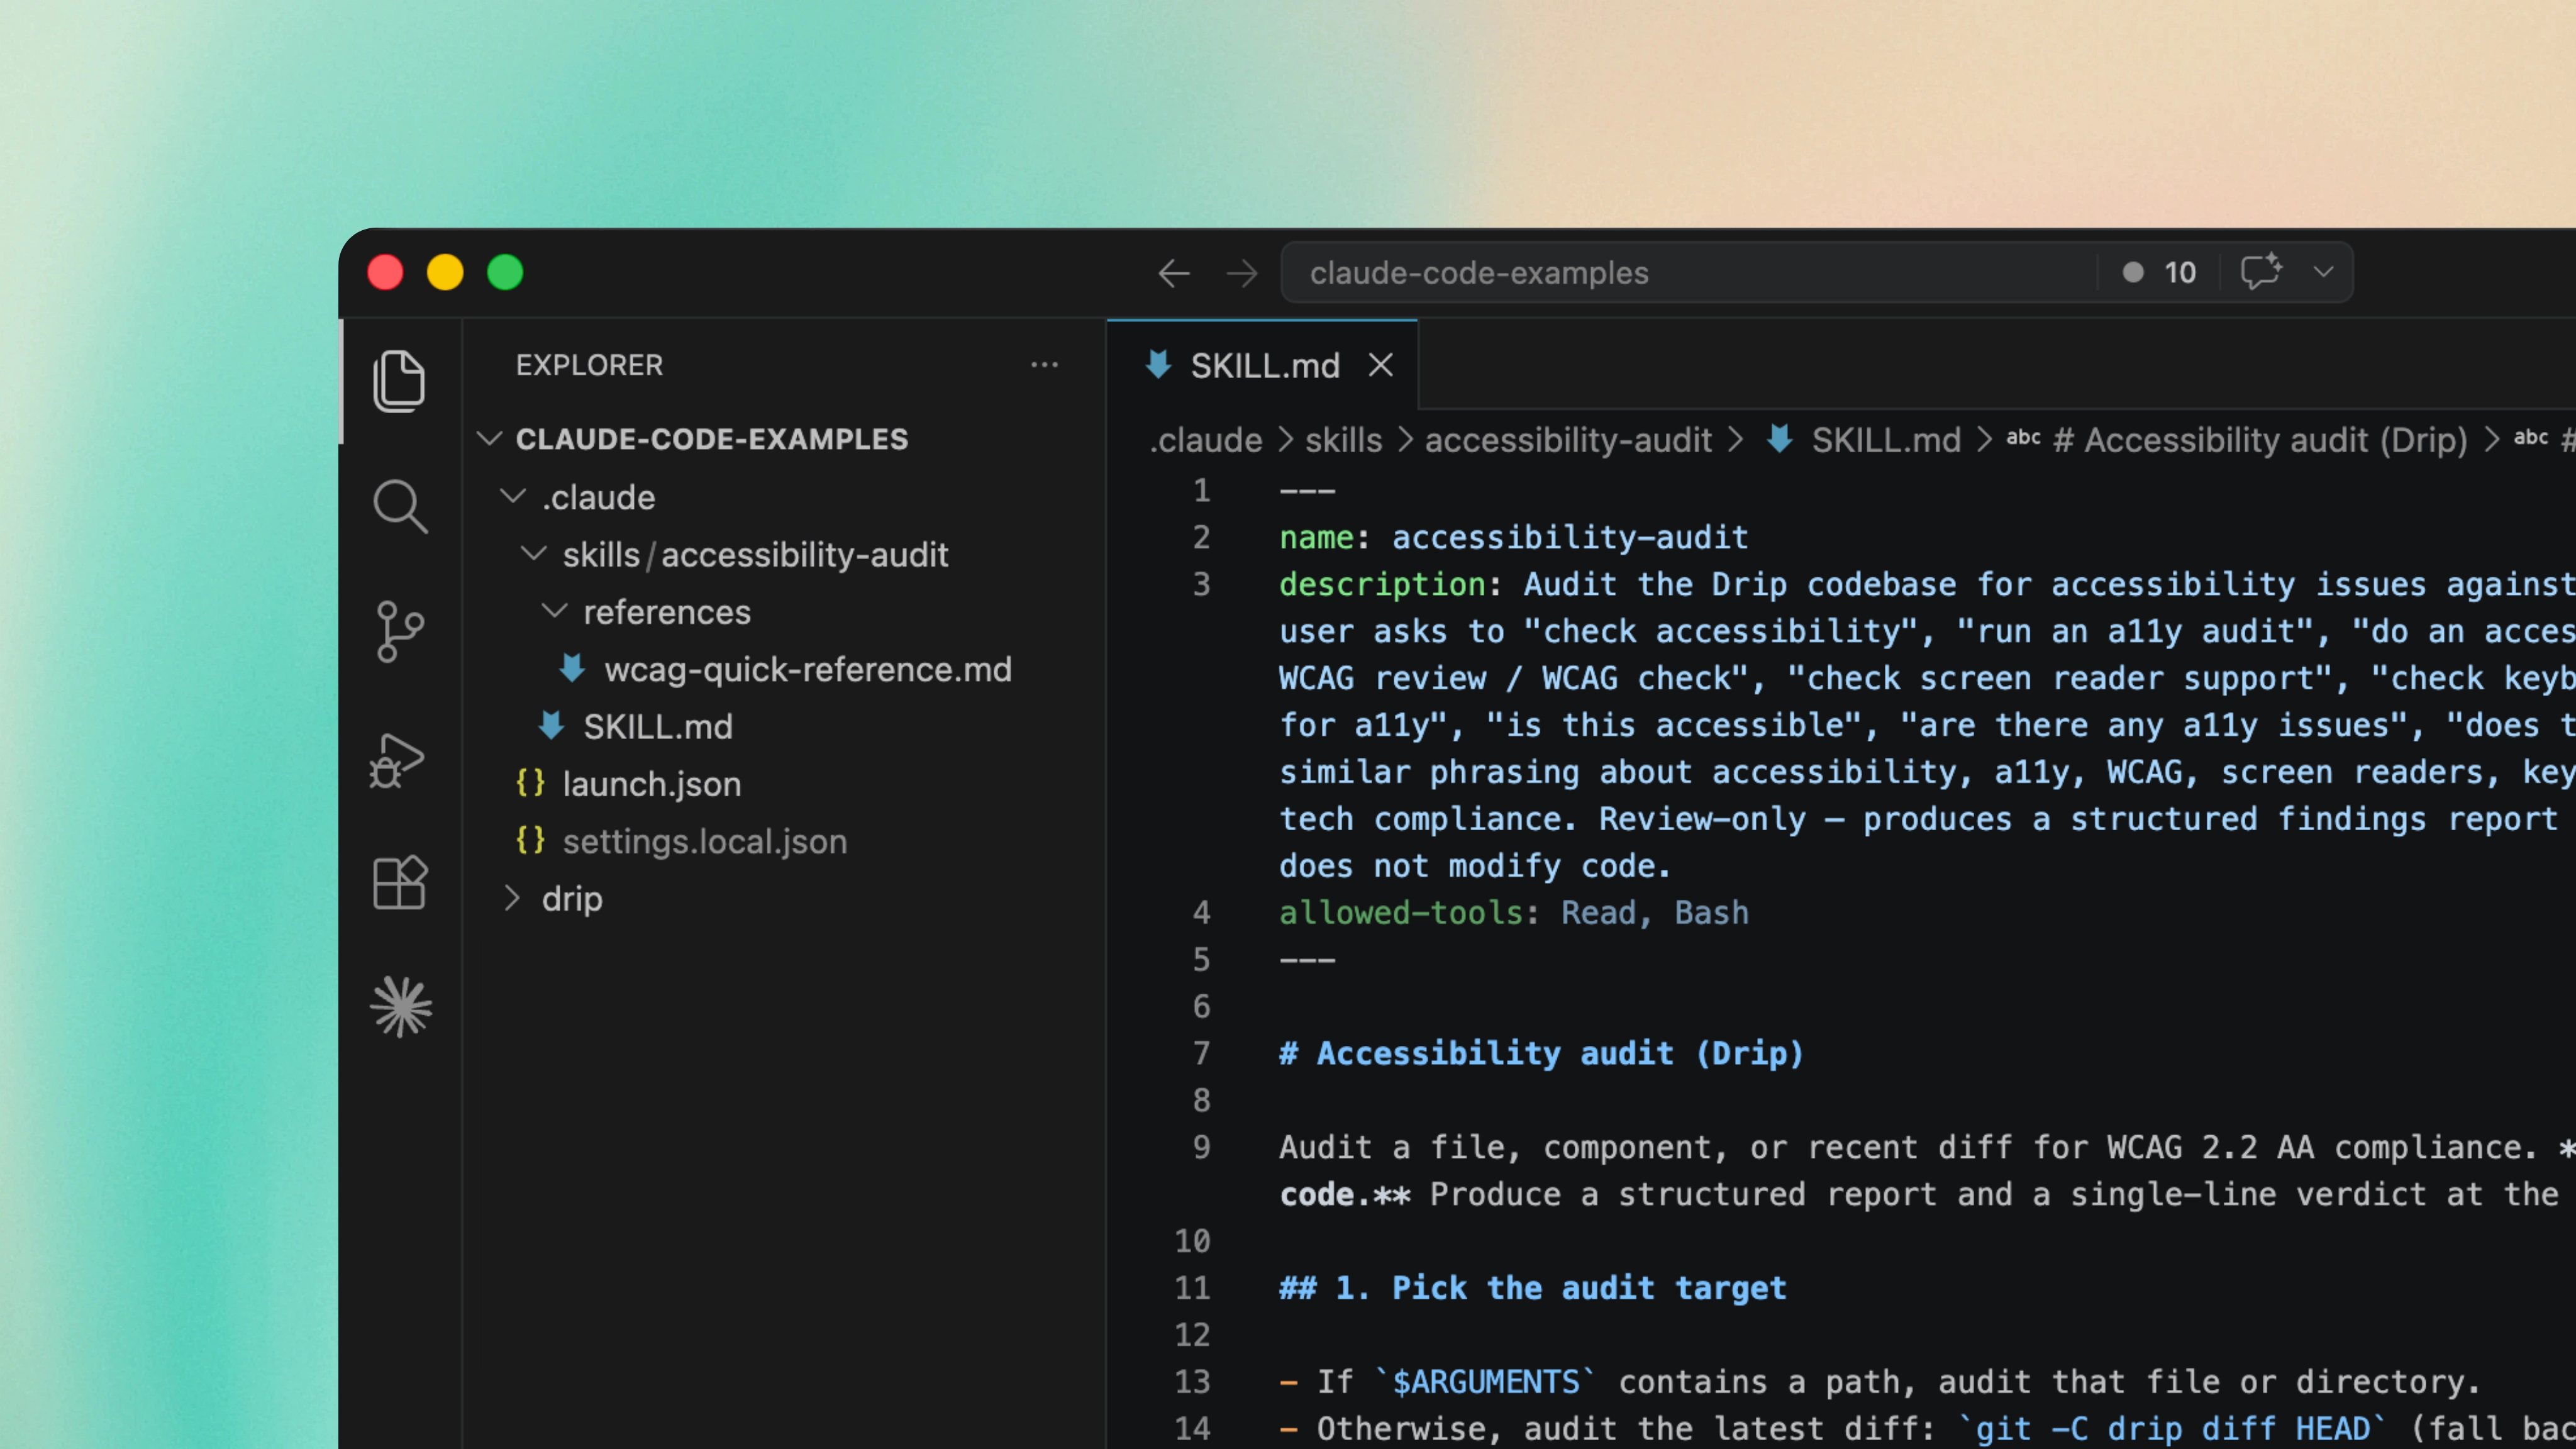
A skill is just a folder with a SKILL.md file inside. This file should have a name and description at the top, which tells Claude when it should use the skill, and then your instructions below. Here's what a simple one looks like:
--- name: pr-description description: Writes pull request descriptions. Use when creating a PR, writing a PR, or when the user asks to summarise changes for a pull request. --- When writing a PR description: 1. Run `git diff main...HEAD` to see all changes on this branch 2. Write the description in this exact format: ## What One sentence explaining what this PR does. ## Why Brief context on why this change is needed. ## Changes - Bullet points of specific changes made - Group related changes together - Mention any files deleted or renamed
The clever bit is how skills are loaded. When Claude Code starts up, only the names and descriptions sit in your context - which means you can have dozens of skills available without bloating the context window. When you ask Claude to do something, it matches your request against the descriptions and asks you to confirm before loading the full body of the relevant skill. That's what makes skills much cheaper context-wise than putting everything in CLAUDE.md.

Skills live in two places:
- Personal skills - live in
~/.claude/skills/and follow you across every project
e.g. your preferred commit message style, documentation format, or test patterns - Project skills - live in
.claude/skills/and get shared with your team through git
e.g. your team's code review checklist, PR description format, or component conventions
The description is the most important field, because it's what Claude uses to decide whether to load the skill. A good description should answer two questions - what does the skill do, and when should Claude use it? If you write a vague description, Claude won't be able to trigger the skill reliably. You should also include the words that you'll likely use, when you're prompting Claude and want the skill to fire.
There are a couple of advanced techniques that you should know about:
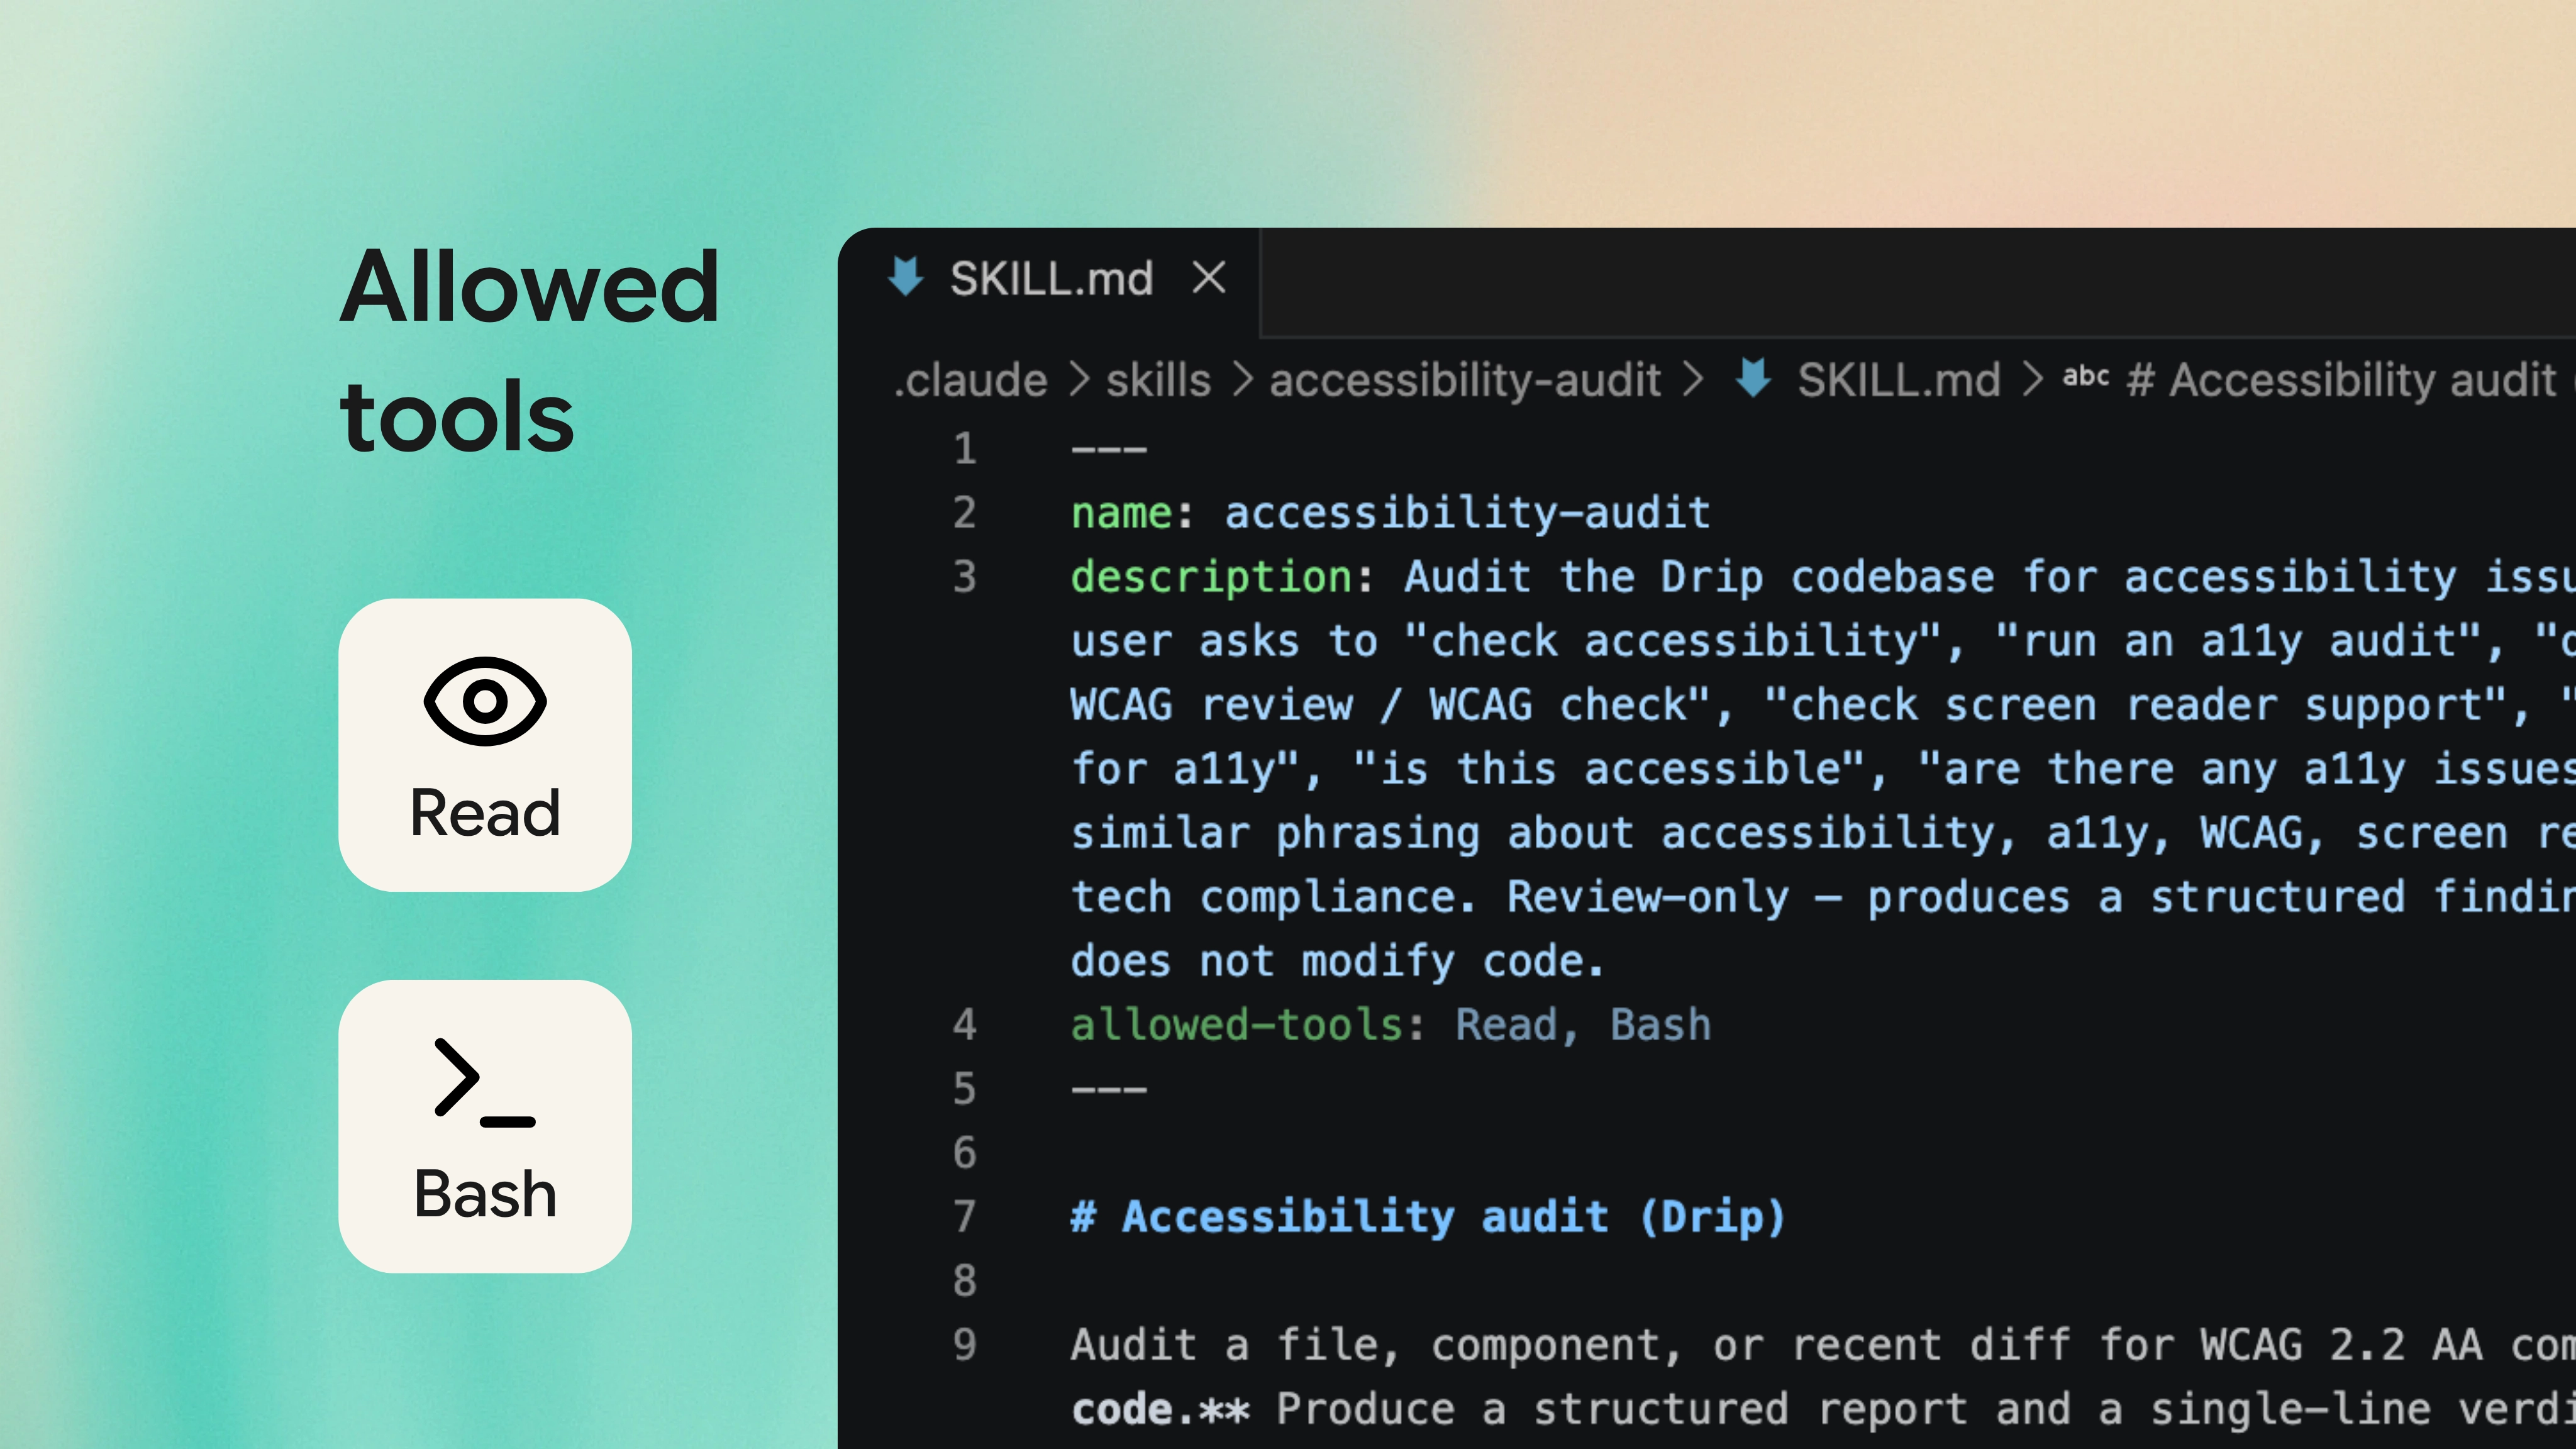
- allowed-tools - allows you to restrict what Claude can do when a skill is active, which is really useful for security-sensitive skills. For example, a code-review skill should only be allowed to read files and run git commands, it should never edit or write files automatically
- Progressive disclosure - useful when a skill grows beyond a single file. You should keep your
SKILL.mdunder 500 lines and move any longer information into subfolders likereferences/,scripts/, orassets/. Claude will only load these extra files when it actually needs them, which prevents your context window from becoming bloated
Knowing when to use a skill versus a CLAUDE.md rule can be a bit confusing at first, so here's how I like to think about it:
If it's a simple instruction that should always apply, you should add a rule to the CLAUDE.md file. For example, we added the "you should always use the term tasting notes, not flavours" rule earlier.
If it's a more complex instruction that's only relevant some of the time, you should create a skill. The accessibility audit above is a good example, as it will only be trigged when we add a new webpage - rather than every time we make a minor change.
10. Add hooks to enforce your project's rules
With hooks, you can ensure that Claude will always do certain things, without you having to ask. They're a bit more technical to set up than skills or slash commands, but they're also much more powerful - as they run automatically at specific points in Claude Code's lifecycle and can even block actions if needed.
Anthropic supports different types of hooks, which can be run at different times:
UserPromptSubmit
Fires when you submit a prompt, before Claude reads it.
Example: Add today's date to every message, or remind Claude of the active task list before it responds.
PreToolUse
Runs before the tool is called, and can block the action entirely.
Example: Ensure Claude never edits your .env file, or block a risky shell command before it runs.
PostToolUse
Runs after the tool completes.
Example: Automatically commit every change to git for a clean undo trail, or send linter errors back to Claude so it can immediately fix the issues.
Stop
Runs when Claude wraps up its response.
Example: Run your test suite after every change, or send a summary to your Slack channel so the team knows what was done.
Notification
Fires anytime Claude needs your attention - not tied to a specific point in the lifecycle.
Example: Play a sound when it's waiting for your permission, or has completed the task.
The most common use case is auto-formatting. A PostToolUse hook can run Prettier (or whichever formatter you use) every time Claude edits a file - so that your codebase stays consistent without you having to think about it. You could write this as a rule in CLAUDE.md and Claude would usually follow it, but a hook makes sure that it happens every time.
{ "hooks": { "PostToolUse": [ { "matcher": "Edit|MultiEdit|Write", "hooks": [ { "type": "command", "command": "prettier --write \"$CLAUDE_PROJECT_DIR\"" } ] } ] } }
Another common use case is blocking things you don't want Claude to do. You can use the PreToolUse hook to automatically inspect a tool call before it runs and decide whether to allow it. If your hook exits with code 2, the action is blocked and an error message is sent back to Claude - so that it knows why this action was blocked and can adjust its plan.
This is useful for any hard rules that you want enforced, rather than mere suggestions for the AI:
- Block commits directly to the main branch
- Block edits to specific files - e.g. production configs, secrets, lock files
- Stop risky commands from being run by Claude - such as
rm -rf - Run your linter after every edit and send errors directly to Claude

To setup your own hooks, you can use the /hooks command inside Claude Code, or edit the .claude/settings.json file directly. Since the settings file lives in your project, you can commit these hooks to git and share them with your team.
Hooks add quite a bit of overhead and complexity, so you should only use them for things that genuinely need to happen every time without fail. Otherwise, you're better off with a skill or a slash command - which are more lightweight and flexible, as they can be triggered when needed and won't run with every single Claude interaction.
11. Build custom subagents
Subagents are incredibly useful for large or complicated tasks. Each subagent will run in a separate context window from your main conversation, which allows Claude to break the work into smaller chunks, explore your codebase in more detail, and only return the final summary to your main thread. Any intermediate steps that the agent does - such as reading files, or performing web searches - stay within the subagent's context and won't clutter your main thread.
You should use subagents when the task is:
- Substantial - it's big enough that delegating makes sense, rather than a quick question you could just ask in your main thread
- Focused - Claude can handle it in one pass, without needing repeated back-and-forth to make progress
- Self-contained - the subagent only ever sees the brief, so the task shouldn't depend on the rest of your conversation to make sense
They're not worth it for quick questions, and they don't work well when the task needs Claude to see everything together - like understanding writing style across loads of content, or a refactor where each step informs the next. In those cases, splitting the work across subagents doesn't make sense - as Claude is losing the subtle context it needs to perform well.
Substantial investigative work that can be briefed cleanly and stand on its own.
- Reviewing a specific component for issues
- Auditing a diff for security or accessibility
- Searching the codebase for everywhere an API is used
- Summarising a long document or log file
Quick questions, or tasks that need the whole picture to perform well.
- A quick question you could ask in flow
- Understanding writing style or brand voice across content
- Cross-cutting refactors where each step informs the next
- Anything where the approach matters as much as the answer
Here are some of the more common subagents people build:
.claude/agents/
├── test-runner.md           # runs the test suite and returns just the failures
├── readme-generator.md      # reads a project and writes a clean README
├── dependency-auditor.md    # scans for outdated or vulnerable dependencies
├── migration-planner.md     # produces a step-by-step migration plan
└── brand-voice-reviewer.md  # rewrites text in your brand's voice
Of course, you don't need to build all of these yourself. Claude Code has several built-in subagents that can handle the common tasks, which you can use straight away:
But you'll get more out of subagents by creating your own. Just run /agents inside Claude Code and it'll walk you through the setup. You can choose the scope (whether the subagent is specific to this project, or should be available for all your projects), the tools it can use, the model that powers it, and a colour so it's easy to spot within the UI.
--- name: security-agent description: Reviews code for security vulnerabilities and risks. Use after a feature involving auth, payments, user input, or external APIs has been implemented. You must tell the agent precisely which files or area of the code to review. tools: Read, Glob, Grep model: sonnet color: red --- You are a security engineer. Your job is to find vulnerabilities and risks in the code before attackers do. For the files in $ARGUMENTS, look for: - Input validation gaps (anywhere user input touches the database, filesystem, or another service) - Authentication and authorisation issues (broken session handling, missing role checks, privilege escalation) - Secret exposure (hardcoded API keys, credentials, or tokens that could leak into logs, errors, or client code) - Injection risks (SQL, command, XSS, prototype pollution, server-side template injection) - Data leakage (errors exposing internals, debug info in production paths, sensitive data in URLs) - Dependency risks (known-vulnerable libraries, outdated crypto, abandoned packages) Provide your findings in this format: 1. Summary - overall security assessment of the reviewed code 2. Critical risks - vulnerabilities that need fixing before this can ship 3. High risks - significant issues that should be addressed soon 4. Lower risks - hardening suggestions and defence-in-depth improvements 5. Areas you couldn't fully verify - anything that needed context you didn't have 6. Obstacles encountered - any setup issues or assumptions you had to make For each issue, explain the actual risk (what could an attacker do?) and suggest a concrete fix. Don't flag stylistic preferences as security issues.
It's worth knowing that the description field does two things, not one. It controls when Claude launches the subagent, but it also shapes the input prompt that Claude writes for it. So if you add something like "You must tell the agent precisely which files or area of the code to review" to the description, the parent agent will start writing more specific launch prompts. Small tweaks to the description can make a noticeable difference to how the subagent performs.
There are four patterns that make subagents reliable:
Specific descriptions
Cover both when the agent launches and what input it receives. The more precisely you describe both, the more reliably the parent agent picks the subagent up and briefs it well.
A clear output structure
Give the subagent natural stopping points so it knows when it's done, rather than rambling on. A numbered structure also makes the output easy to scan when it returns to your main thread.
An "obstacles" section
Explicitly ask the subagent to report any setup issues or workarounds it discovered. That way they bubble up to the main thread rather than getting lost in the subagent's context.
Limited tool access
Give it only the tools it needs. Read-only for research agents, Bash for code reviewers, Edit and Write only for ones that should actually change code.
It's unlikely that the first version of your subagent will be perfect, so you'll need to make some tweaks after you see how it performs in the real world. You might need to make minor changes to the description or output structure, until you're happy with everything - so don't expect that you'll get it right first time.
12. Manage your context window
Every AI model has something called a "context window", which holds your entire conversation and allows Claude to have a better picture of what you want to do. It includes every message that you send, every file that Claude has read, and every tool that it has called.
Over time, this context window starts to fill up and you'll notice that the model's performance starts to drop off. Claude might forget some of your earlier instructions, make more mistakes, and the whole session starts to feel a bit slower. So whenever you're working on a long session with Claude, you need to keep your context window in mind and be ready to clear it.
How context fills up over a session
Example timelineFirst prompt"Add a dark mode toggle to the site header"
+4 file reads+2 grep calls+a few replies
+Plan mode session+3 MCP calls+5 file edits
Claude starts forgetting earlier instructions and repeating mistakes.
Time to run /clear or /compact before going further.
Here are a few commands that you can use to manage your context window and improve Claude's performance over long sessions:
- /clear - wipes the context completely. Use it when you're switching to an unrelated task, or starting fresh after you've added a new feature
- /compact - summarises the conversation so far, which frees up space and preserves the key decisions. You can also focus the compaction with something like
/compact focus on the API changes, which keeps the parts that matter and drops any noise
I tend to use /clear whenever I can, especially when we don't need to carry forward context for the next task. /compact is the right choice when you want to keep going on the same thread but you're running out of room.
Anthropic has recently added auto-compact to Claude Code, which automatically compacts your conversation when it becomes too long. It's a useful safety net, but it loses some of the detail and nuance from your earlier conversation - so it's not as effective as clearing the context yourself.

Sometimes Claude will head off in a direction that you didn't intend, and the fastest fix is to undo rather than ask it to remove the code. There are two commands that can handle this:
- Esc - interrupts Claude mid-action if you see it going off track. Your context is preserved, so you can redirect it without losing what came before
- Esc + Esc (or
/rewind) - restores your code and conversation to an earlier checkpoint. Whenever Claude Code does an action, it creates a checkpoint - allowing you to easily roll back the changes it made
When Claude gets something wrong, it's perfectly normal to correct it and try again. That works a few times - but after lots of failed attempts, the conversation starts to fill up with bad approaches and Claude only becomes more confused with each one.
/rewind is the better tool for this, as it allows you to return to a previous state and try again with a better prompt. It's also faster than using /clear because you don't lose the rest of the conversation, and you can stop the mistakes from compounding.
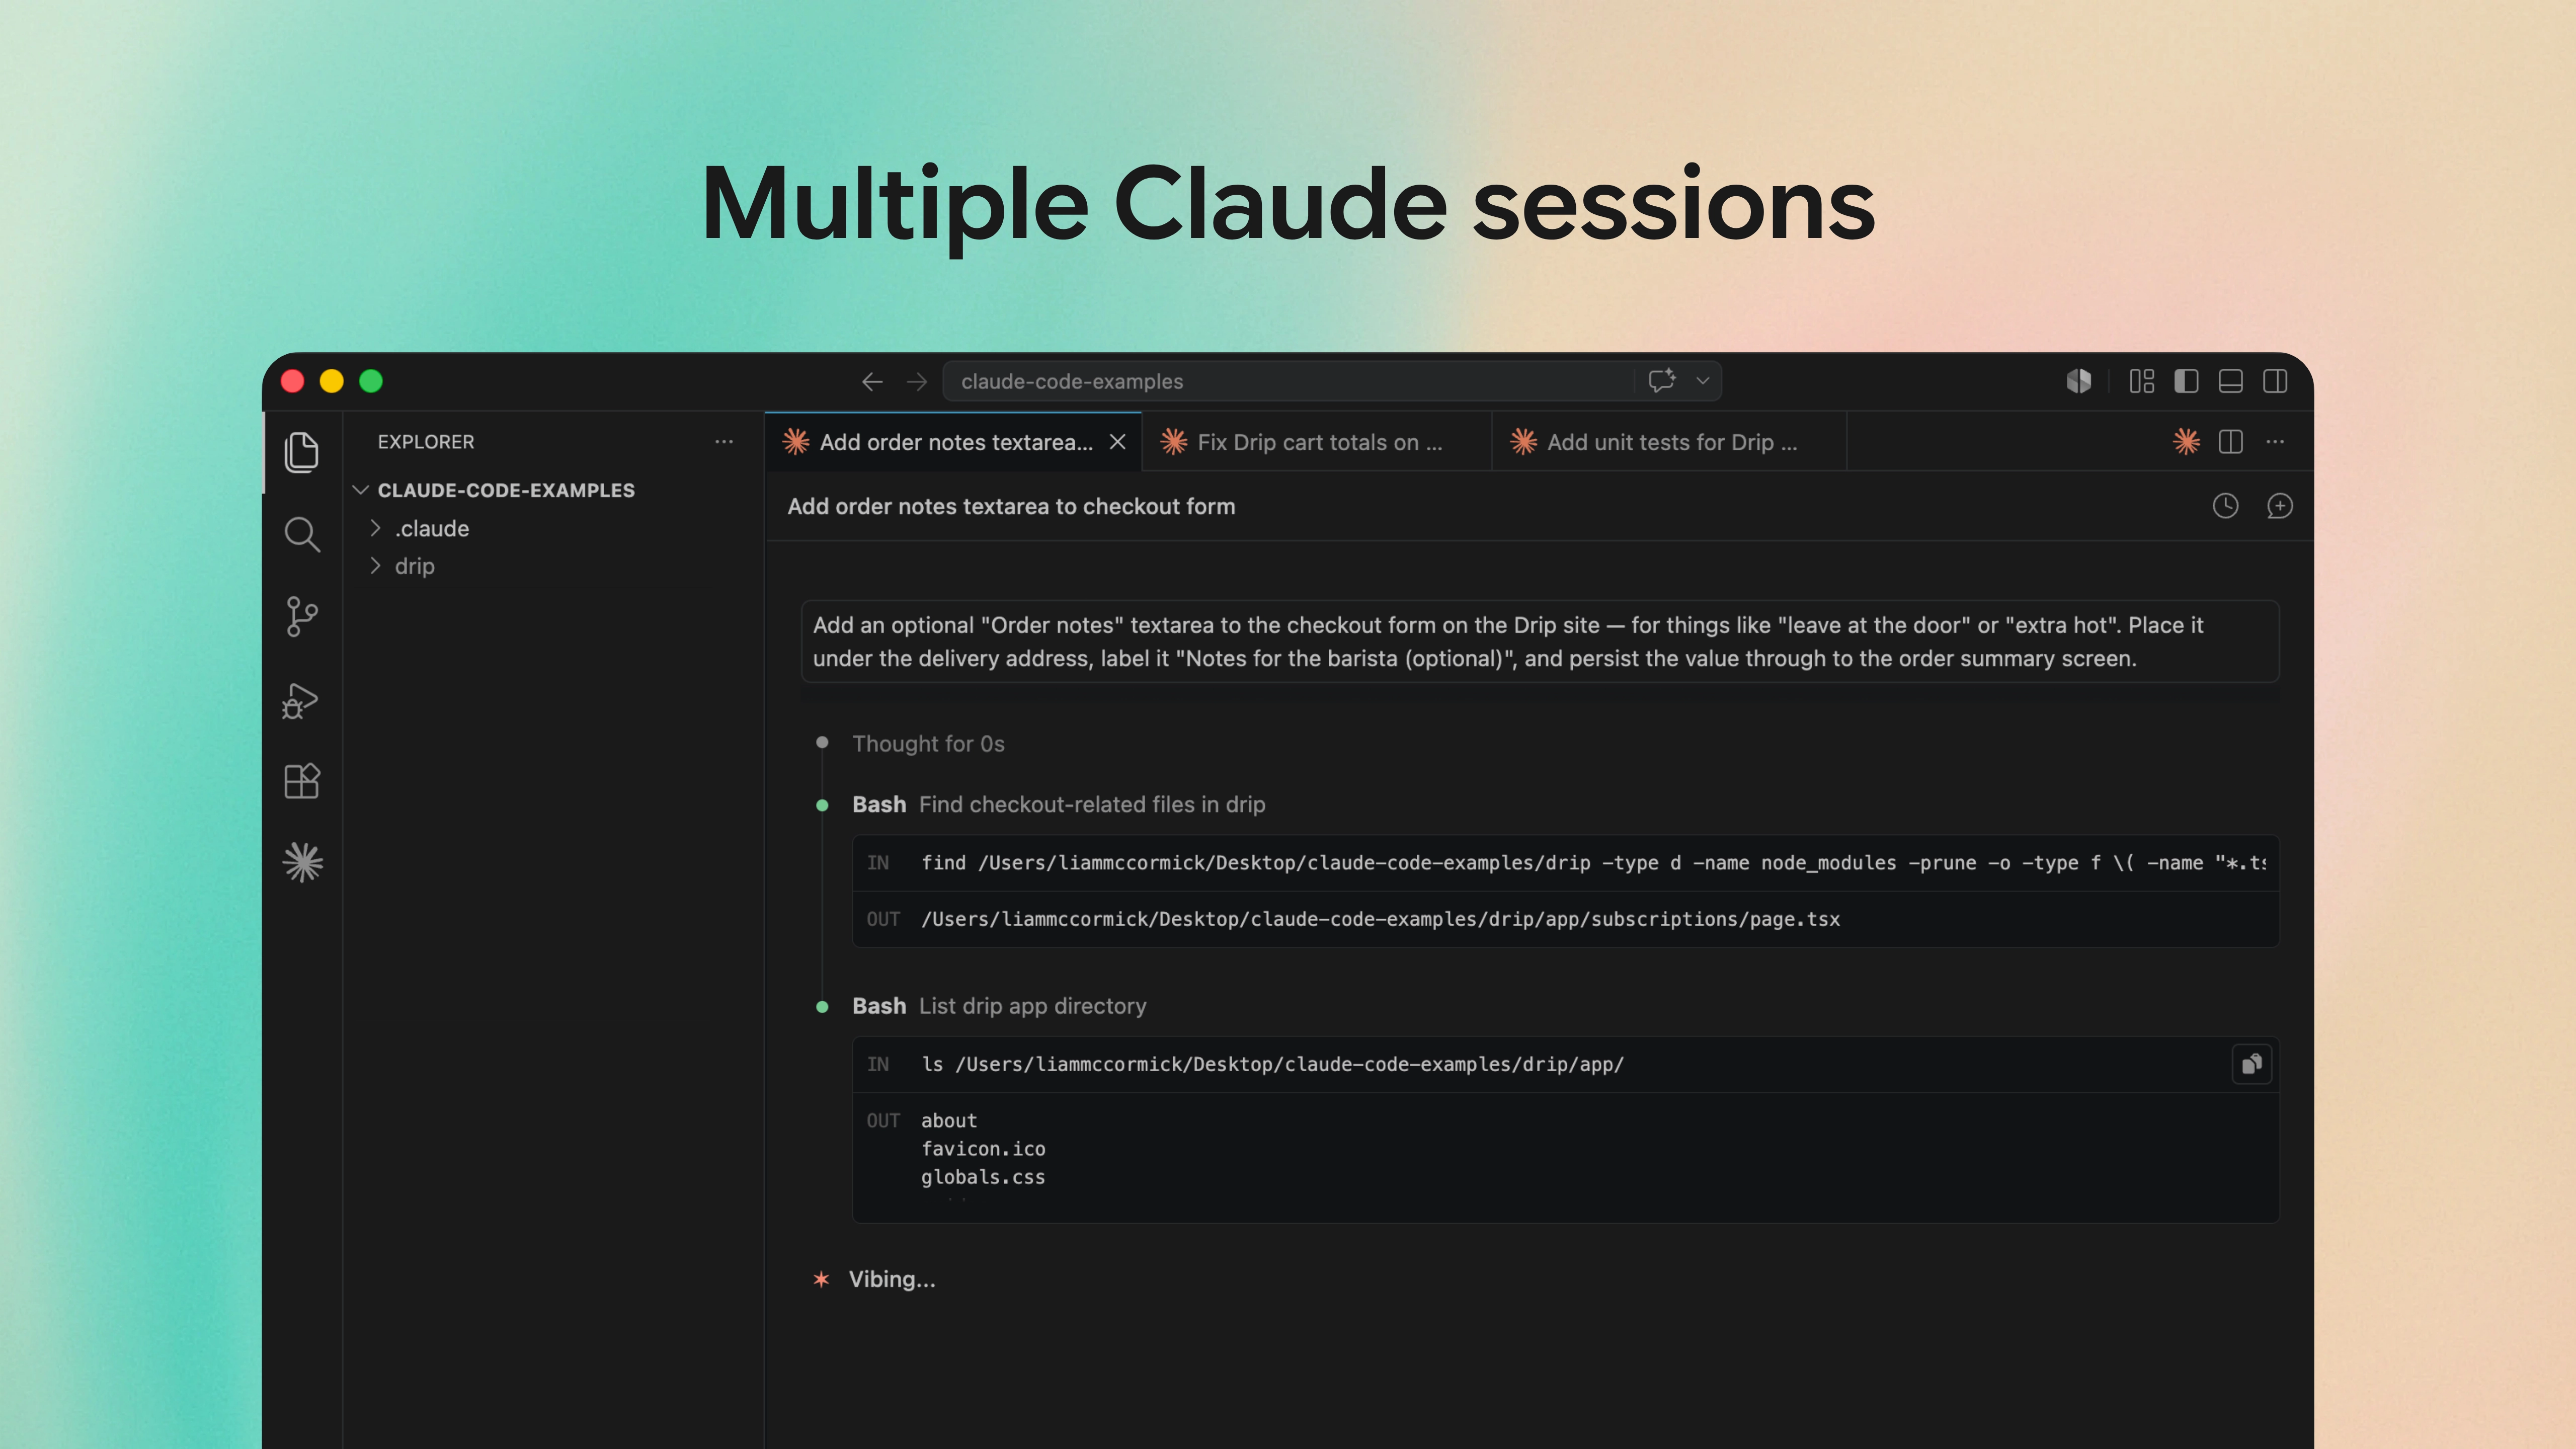
13. Run multiple Claude sessions in parallel
After using Claude Code for a while, you find that you're waiting on one big task to finish and then realise that you could have kicked off several small jobs in parallel. For example, you could have asked Claude to rewrite a README, fix a bug on another page, and add the unit tests that you've been putting off.
However, running two Claudes on the same project folder can add issues - as the models can trip over each other's file edits, leave the codebase in a broken state, and you might spend more time untangling conflicts than you would have writing the code yourself.
To solve this, you should be using Git worktrees. If you're unsure what this is, a worktree is a separate folder that has contains a copy of your project and sits on its own branch. This is essentially Git's term for a parallel version of your code, which won't affect the others until you merge it back. Each Claude gets its own worktree, can work away in isolation, and you then merge the changes back when each one finishes.
Three Claudes working in parallel
Dark mode toggle
Refactoring the auth flow
Writing unit tests
The good news is that Claude Code has all of this built in for you. Simply add --worktree feature-x (or -w feature-x for short) when you launch Claude in the Terminal and it'll set up an isolated worktree on its own branch, then drop you straight into a fresh Claude session inside it.
Once you've done that, you should open another terminal, and run the command again with a different name. You've now got a second Claude working in parallel, completely separate from the first.
# Launch a Claude in an isolated worktree for a feature claude --worktree feature-x # In another terminal, do the same for a bug claude --worktree bugfix-42 # Each Claude gets its own folder under .claude/worktrees/ # and its own branch (worktree-feature-x, worktree-bugfix-42)
It's worth noting that a worktree is a fresh checkout, so any untracked files - like .env or .env.local - won't be there by default. If you have files that you need in every worktree, you should list them in a .worktreeinclude file at the root of your project (it uses the same syntax as .gitignore) and Claude Code will copy them in for you.
This also pairs nicely with subagents. You can add isolation: worktree to a custom subagent's frontmatter and each one will run in its own temporary worktree - allowing you to hand off a heavy investigation and have it running in the background, without it ever touching your main project files.
If you're using the Claude desktop app, this all happens automatically - every new session is given its own worktree, so you don't need to change any settings or add the --worktree flag.
Overall, this changes where the bottleneck is. It's no longer "how fast can Claude work", it's now "how many Claudes can I keep track of at once?". Running three parallel Claudes isn't actually three times faster, if you can't review their work fast enough and are becoming overwhelmed. I find that two or three is the sweet spot, but it really depends on the complexity of what each one is doing.
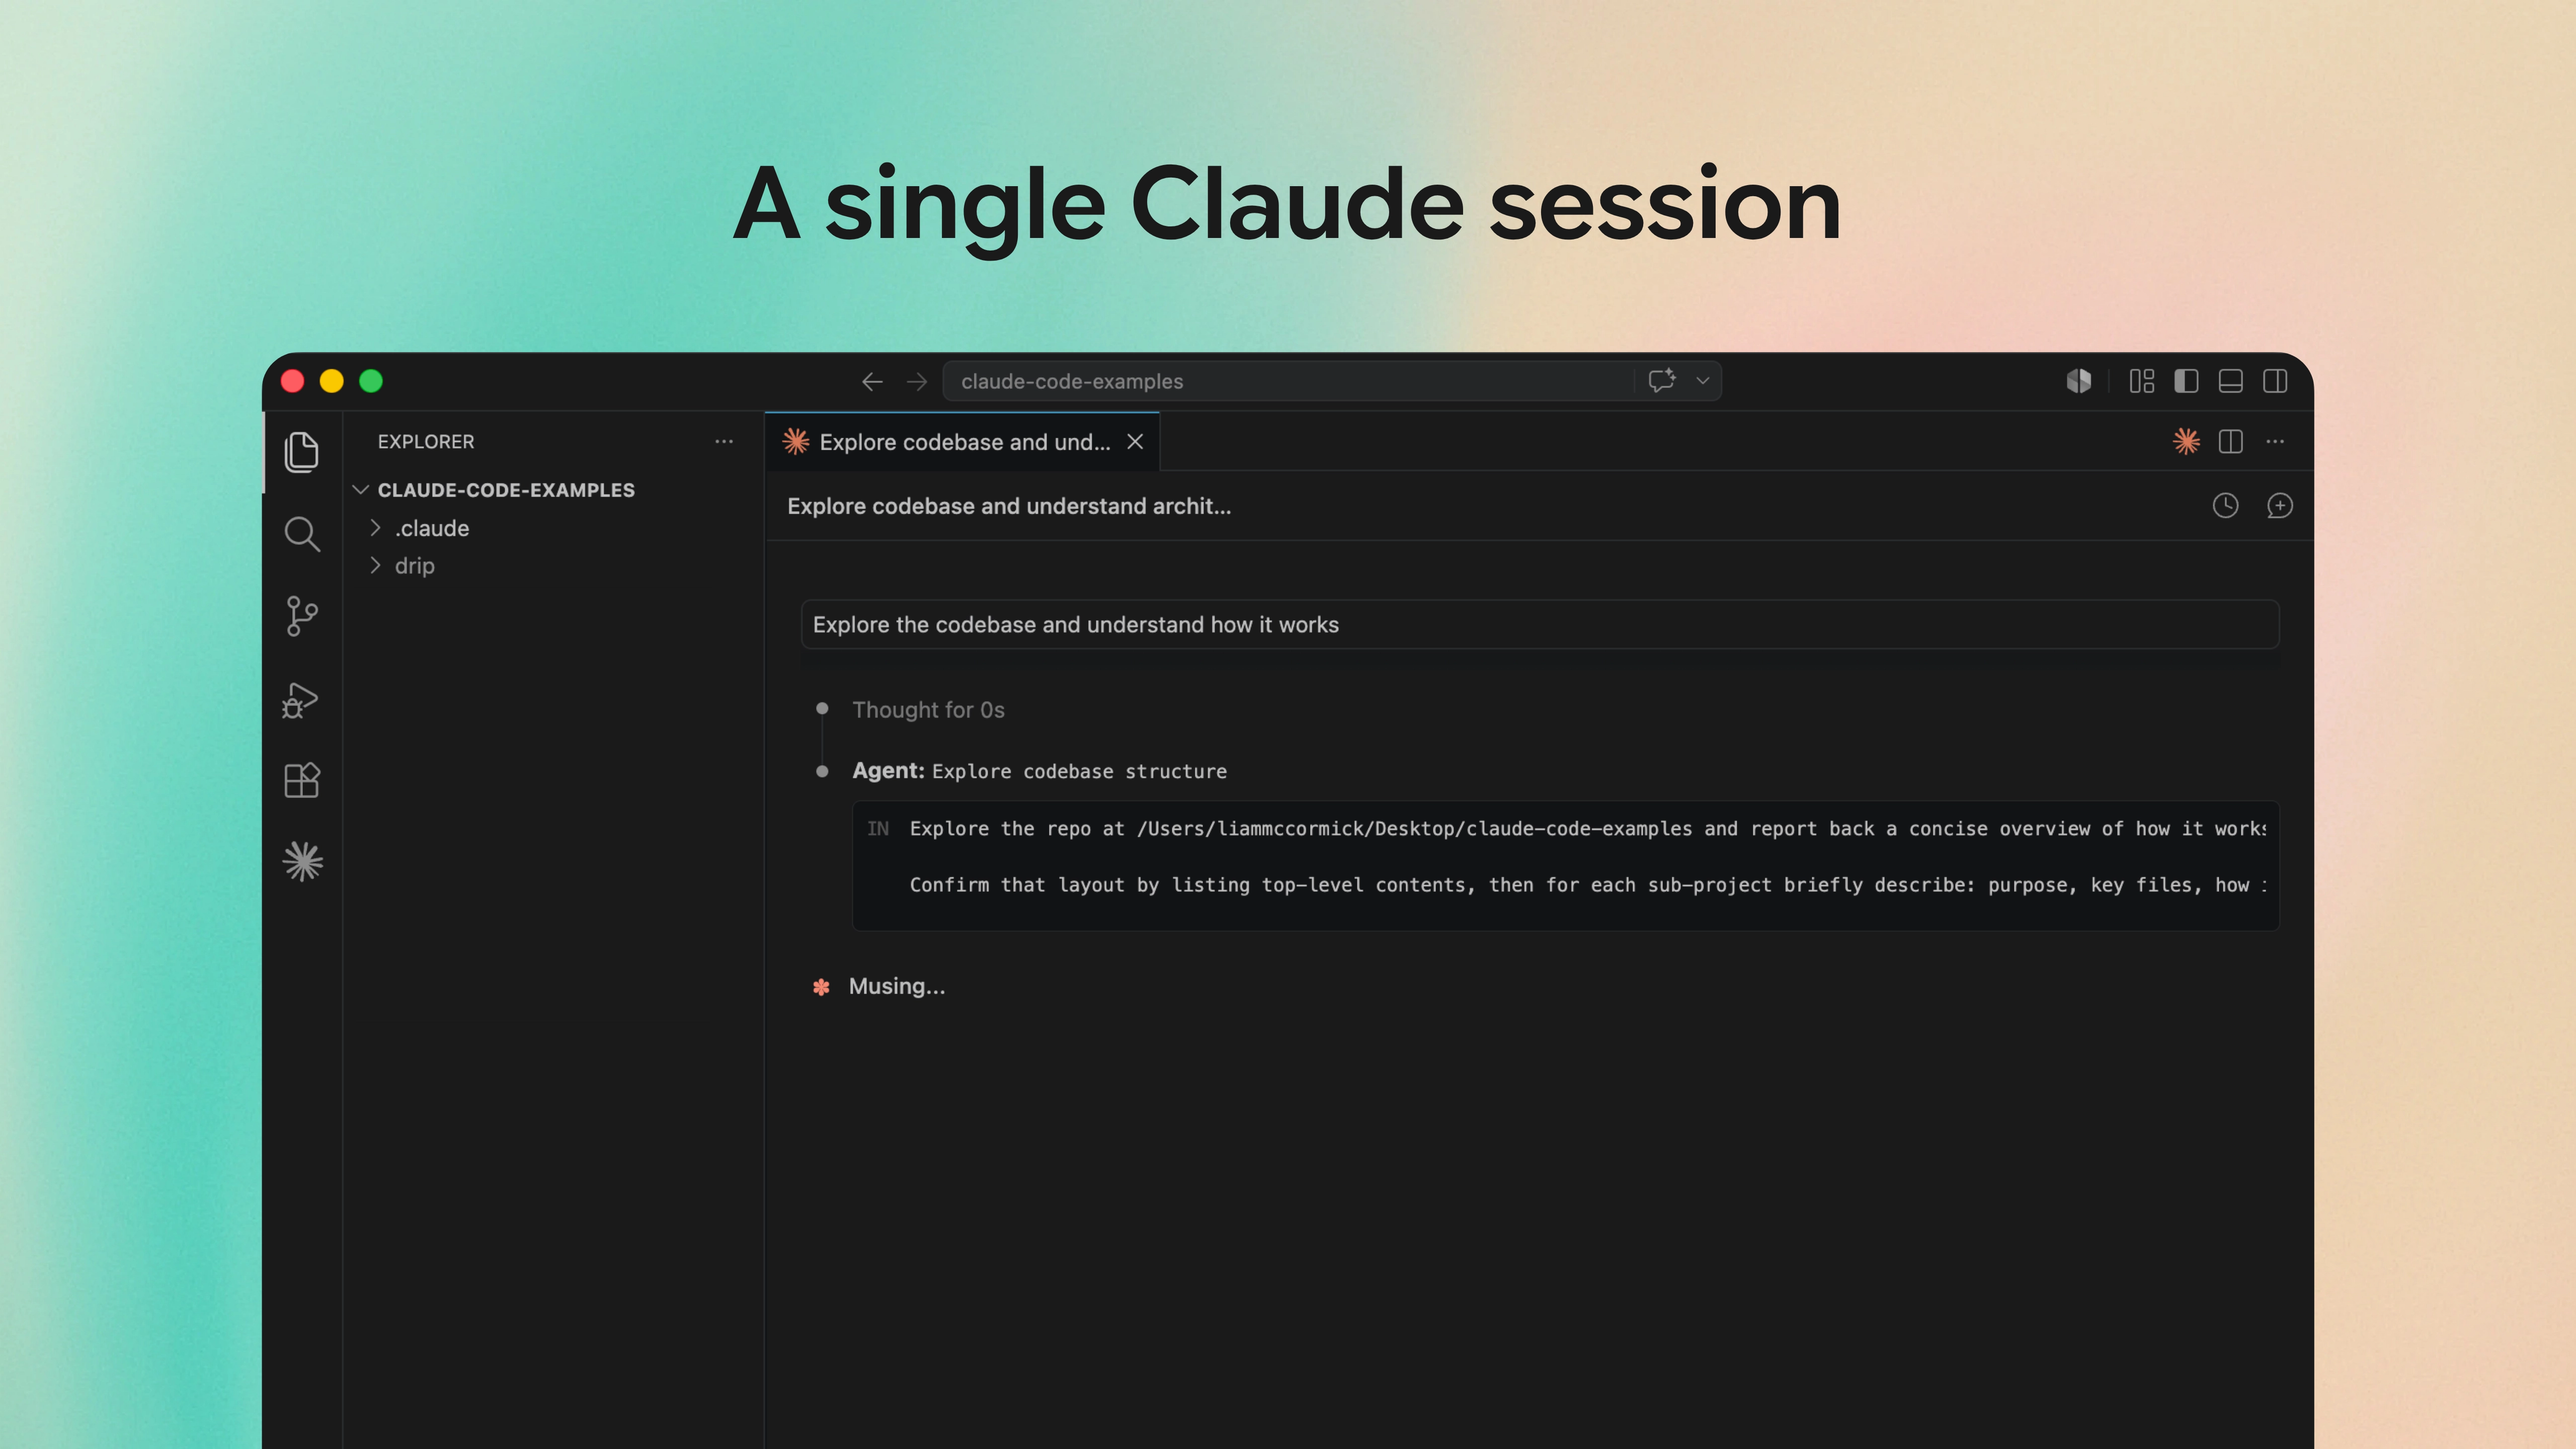
Multiple Claude sessions work really well when the tasks are completely separate - like one Claude that is changing the UI, one that's improving the API, and another that's writing unit tests. But it doesn't work as well when the tasks need to coordinate or share state. In those situations, you should keep everything in a single conversation so that Claude can keep the context it needs.
Key takeaways
I've been using Claude Code for the last year and it's an abolute joy to use. We now have access to an incredibly powerful tool that allows anyone to write code, fix issues in minutes, and design new user experiences that delight people.
During this time, I've really put Claude Code through its paces and given you lots of strategies for getting the most from it. Here's a quick overview of the different topics we've covered in this guide:
1. Most problems are caused by vague prompts
Whenever Claude gives you a bad result, the first thing you should check is the prompt and whether it was specific enough. Nine times out of ten, the issue isn't Claude - it's that you didn't tell it exactly what you wanted. By just spending an extra 30 seconds on the prompt and being clearer, you'll save yourself 10 minutes of back-and-forth with Claude.
2. Screenshots are worth more than you'd think
AI models have got dramatically better at analysing images over the last year. They can now pick up on layouts, design details, and visual bugs with a level of accuracy that wasn't really possible before. Simply paste in a Figma design, or a screenshot of an annoying UI bug - it's far more effective than trying to describe what you want in words.
3. Let Claude research before it builds
Before you jump into code changes, ask Claude to research the codebase first. It will read the relevant files, understand the patterns that are already being used, and produce much better results. This is particularly useful when you're working in an unfamiliar part of the codebase.
4. Use plan mode for the big stuff
For complex tasks, use plan mode so that Claude can think through the approach before it writes any code. It's a bit more effort upfront, but it will save you time as Claude is less likely to make wrong decisions and lead to unnecessary changes. For really hard problems, bump /effort up a level or two to give Claude a bigger reasoning budget.
5. MCP servers are a game-changer once you set them up
I put off setting up MCP servers for quite a while, as it seemed like extra work for very little gain. But once I connected it to Figma, GitHub, and Notion, my workflows became much more powerful. The single biggest improvement is the Playwright MCP server, as it allows Claude to open your website in a real browser and then iterate on the UI until it matches what you asked for.
6. The GitHub App gives you an extra teammate
Installing the GitHub App means that Claude can run inside GitHub Actions - reviewing every PR automatically and responding to @Claude mentions on any issues. For teams, this is one of the best things you can set up - it's like having an extra teammate that can pick up tickets when you're away from the laptop.
7. CLAUDE.md gets better with age
Run /init to generate a starter file, then refine it every time Claude makes a mistake that could have been prevented with a rule. Use # in the chat to add rules as you go, but make sure you keep it concise. If the file is too long, Claude will start ignoring half of it.
8. Automate your best prompts
Once you've written a prompt that consistently gives you great results, save it as a slash command so that you never have to write it again. Drop a markdown file in .claude/commands/ and your whole team can use it. It's one of the best ways you can standardise quality across a project.
9. Skills are the next step beyond slash commands
If a slash command is a prompt that you invoke manually, a skill is a prompt that Claude invokes automatically when it recognises the task. Drop a SKILL.md in .claude/skills/ and you can stop typing the same command for every PR review or commit message.
10. Use hooks for the things that absolutely must happen
Hooks turn "Claude usually does X" into "Claude always does X". Use them to keep your code consistent, block dangerous commands, or anything that always needs to happen - rather than a suggestion. But don't reach for them when a simple CLAUDE.md rule would do.
11. Delegate tasks to subagents
Use subagents when you only need the final answer, not the individual steps that Claude took to get there. For research, code reviews, and any substantial task that can be summarised cleanly, custom subagents are excellent - they will keep your main thread clean and use their own context instead. Avoid using subagents for quick questions, or any refactors where each step informs the next.
12. Context is your most valuable resource
Use /clear to reset the context window between tasks, and ask Claude to use subagents for research. If you find that you're correcting Claude lots of times and it's still wrong, don't correct it anymore - start fresh, enter Plan mode, and outline what Claude has already tried. Simply restarting with a clean context and good prompt will often outperform a long, cluttered conversation.
13. Scale up with parallel Claudes
Claude Code already allows you to run sessions in parallel - just pass --worktree when you launch a Claude instance and each one will be given an isolated copy of your project. It's a big jump in how much work can get done, but you then become the new bottleneck - so don't run more in parallel than you can review.
Summary
Claude Code is one of the most exciting tools I've used in years. It's allowed me to do things faster than ever, fix issues in minutes, and build products that wouldn't have been possible before. Hopefully, the techniques in this guide will help you get to just as much out of the tool - and enjoy using Claude Code as much as I do.
If you found this guide useful, you'll enjoy my weekly newsletter - every week I analyse the latest AI advances and how you can use them. It's free and you can unsubscribe at any time.
Read by executives at:
You might also like

AI use cases for everyone
Practical ways that you can use AI. At work, at home, and everywhere in between.

Create your first AI agent
A comprehensive guide to building and deploying your first AI agent.

Create a short film with AI
The workflow I used to create an animated short in three days, with zero filmmaking experience.